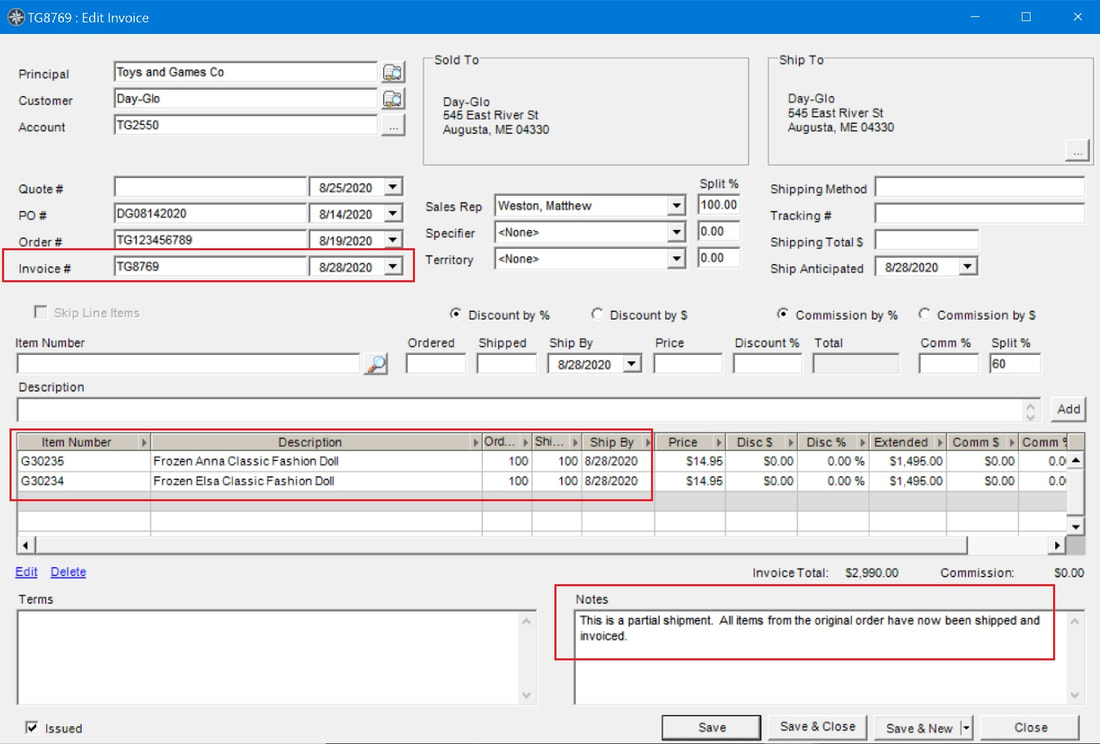
In MRSware desktop you can have multiple invoices associated with a single order.
Here's how to enter partial shipments in MRSware's Invoice Entry:
Here's how to enter partial shipments in MRSware's Invoice Entry:
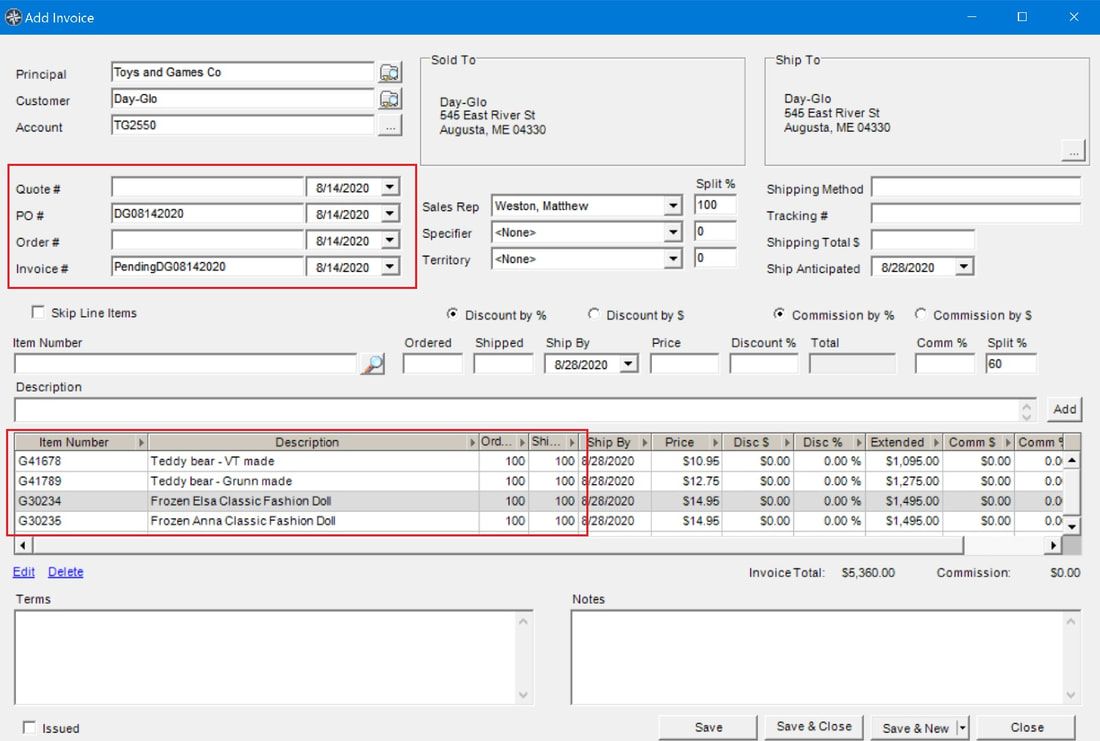
First enter the order in Invoice Entry:
1 - Go to Invoice Entry
2 - On the Menu bar, click on "New"
3 - In the Add invoice dialog:
- enter the Manufacturer's name in the Principal field
- enter the Customer name in the Customer field
The Account number, the Sales Rep, and the Sold To and Ship To information will automatically populate, if the customer is already in the system.
4 - Enter the Customer Purchase Order number in the PO # field and the date
5 - Enter a temporary Invoice number in the Invoice # field and the date (In our example we used the Customer's PO # with "Pending" preceding it. This makes it easier to spot an order the Invoice entry field)
6 - Uncheck the "Skip Line items" box
7 - Enter the Line items
8 - Click "Save and Close"
1 - Go to Invoice Entry
2 - On the Menu bar, click on "New"
3 - In the Add invoice dialog:
- enter the Manufacturer's name in the Principal field
- enter the Customer name in the Customer field
The Account number, the Sales Rep, and the Sold To and Ship To information will automatically populate, if the customer is already in the system.
4 - Enter the Customer Purchase Order number in the PO # field and the date
5 - Enter a temporary Invoice number in the Invoice # field and the date (In our example we used the Customer's PO # with "Pending" preceding it. This makes it easier to spot an order the Invoice entry field)
6 - Uncheck the "Skip Line items" box
7 - Enter the Line items
8 - Click "Save and Close"
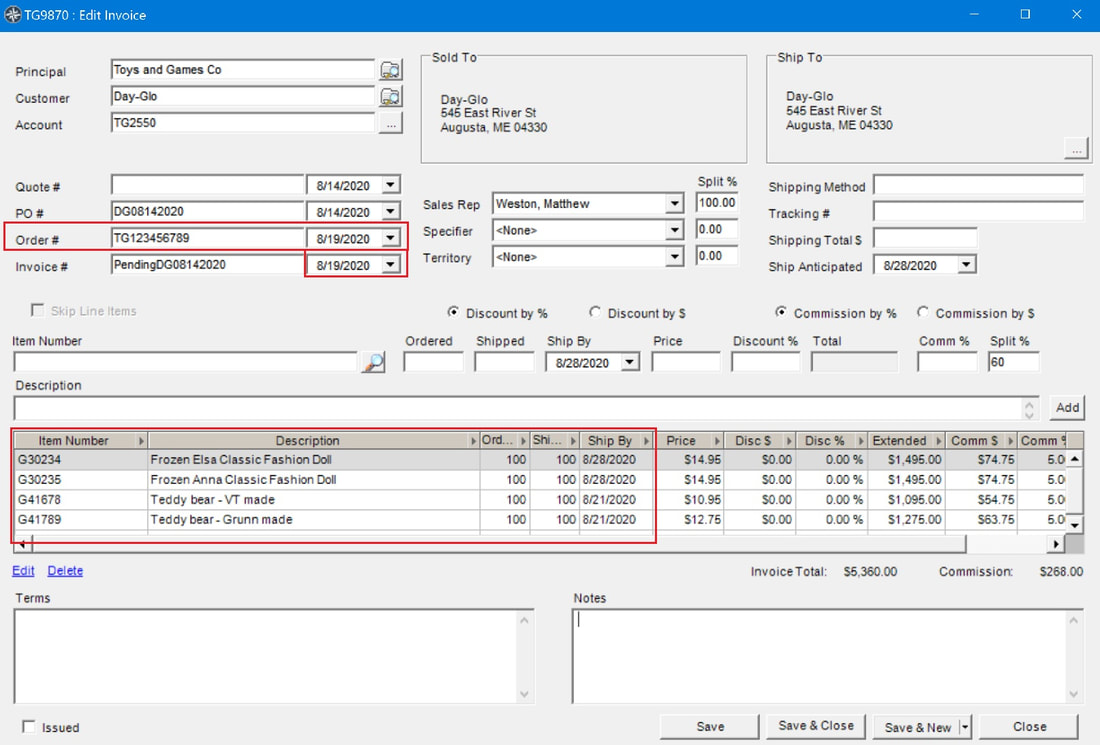
When the Order Acknowledgement (confirmation) is received, you will enter the Manufacturer's Order Acknowledgement (confirmation) number in the Order # field.
1 - Go to Invoice Entry
2 - Click on the Purchase Order
3 - Enter the Manufacturer's Order Acknowledgement number in the Order # field
4 - Enter the Order # date
5 - Click "Save and Close"
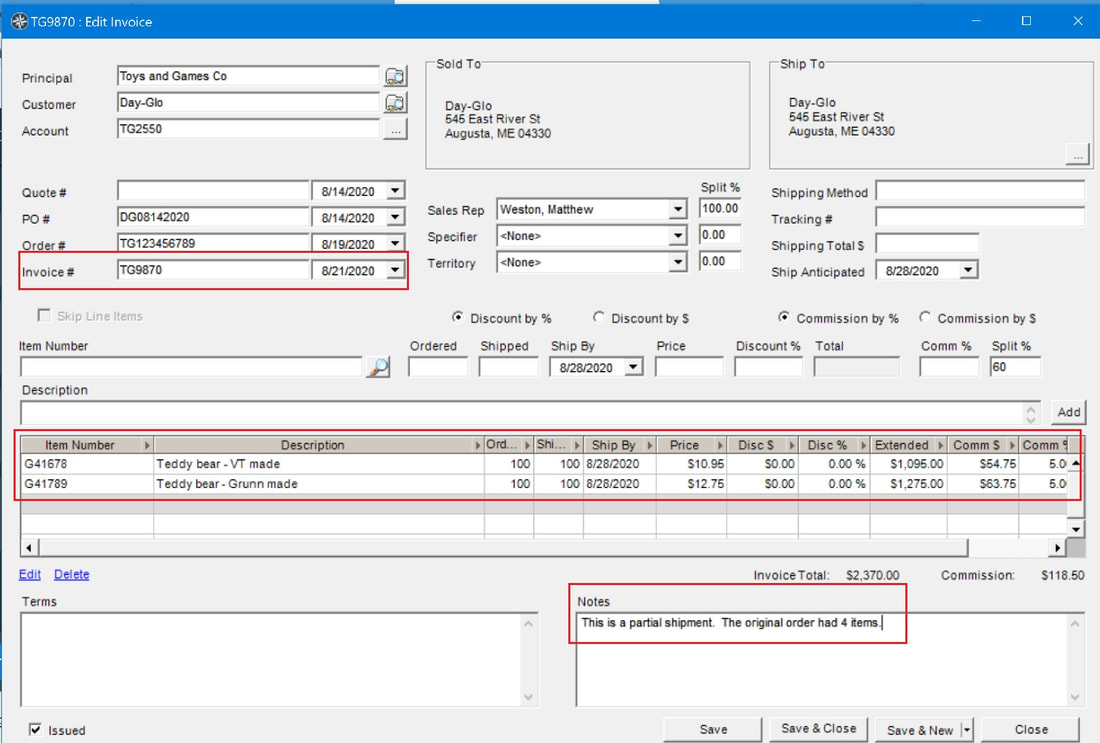
There was a partial shipment - 2 line items shipped and 2 line items didn't ship. You will enter the actual Invoice number in the Invoice # field.
1 - Go to Invoice Entry
2 - Click on the Order
3 - Enter the Manufacturer's Invoice number in the Invoice # field
4 - Enter the Invoice date
** You may want to add a note in the Notes field indicating that this invoice is a partial shipment.
5 - Click "Save and Close"
1 - Go to Invoice Entry
2 - Click on the Order
3 - Enter the Manufacturer's Invoice number in the Invoice # field
4 - Enter the Invoice date
** You may want to add a note in the Notes field indicating that this invoice is a partial shipment.
5 - Click "Save and Close"
There was another partial shipment, which made the order complete. You will enter the actual Invoice number in the Invoice # field.
1 - Go to Invoice Entry
2 - Click on the Order
3 - Enter the Manufacturer's Invoice number in the Invoice # field
4 - Enter the Invoice date
** You may want to add a note in the Notes field indicating that this invoice is a partial shipment and again may want to add that all items from the original order have now been shipped.
5 - Click "Save and Close"
1 - Go to Invoice Entry
2 - Click on the Order
3 - Enter the Manufacturer's Invoice number in the Invoice # field
4 - Enter the Invoice date
** You may want to add a note in the Notes field indicating that this invoice is a partial shipment and again may want to add that all items from the original order have now been shipped.
5 - Click "Save and Close"