
When you want to add a new sales rep or territory, go to "Sales Reps", found under the Contacts menu.
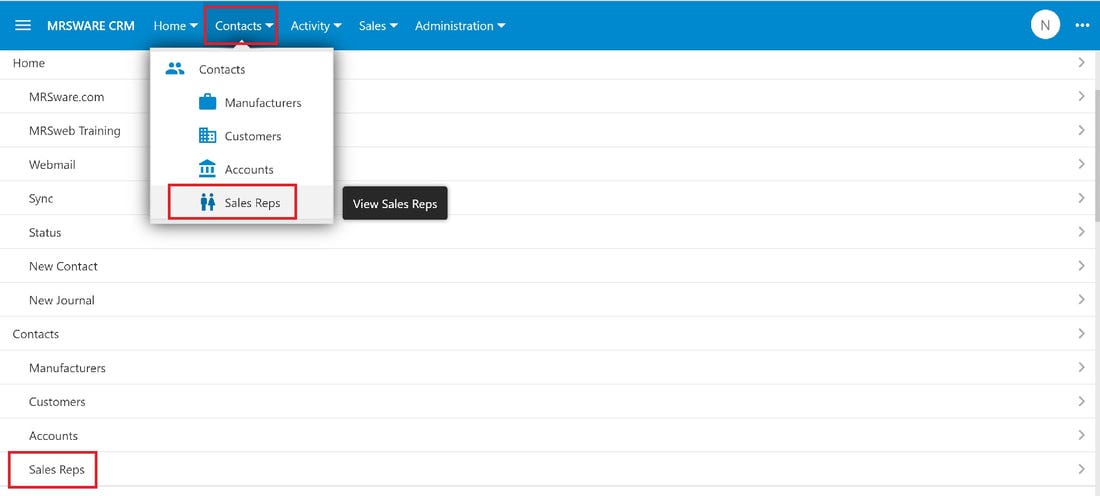
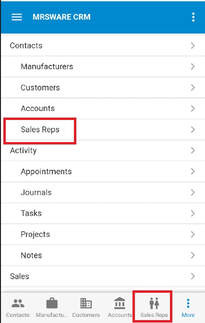
Here's how to add a new sales rep or territory:
i - As in the MRSware desktop client there is more than 1 way to add a new sales rep or territory
Desktop options
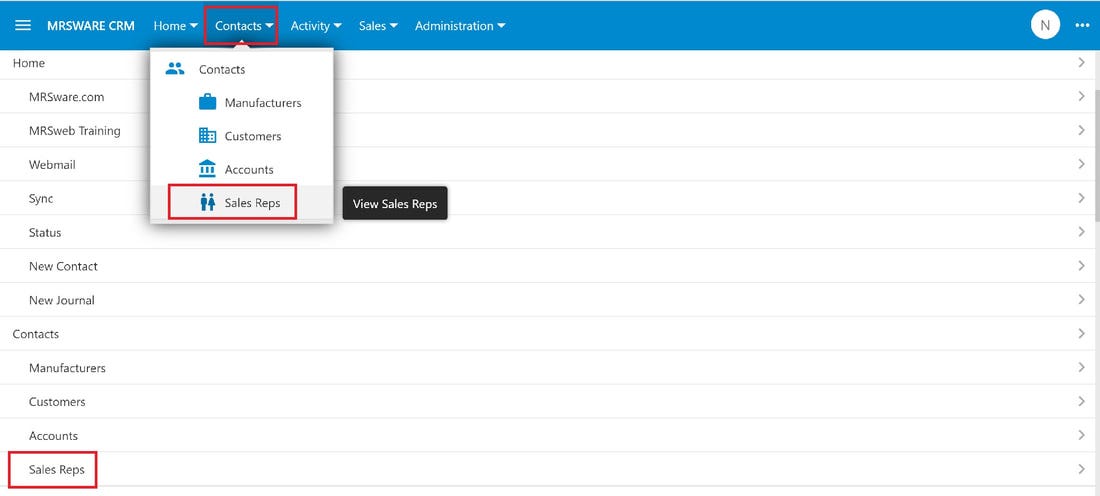
Option 1:
1 - Click or tap on "Contacts - Sales Reps" on the Menu bar or Menu list
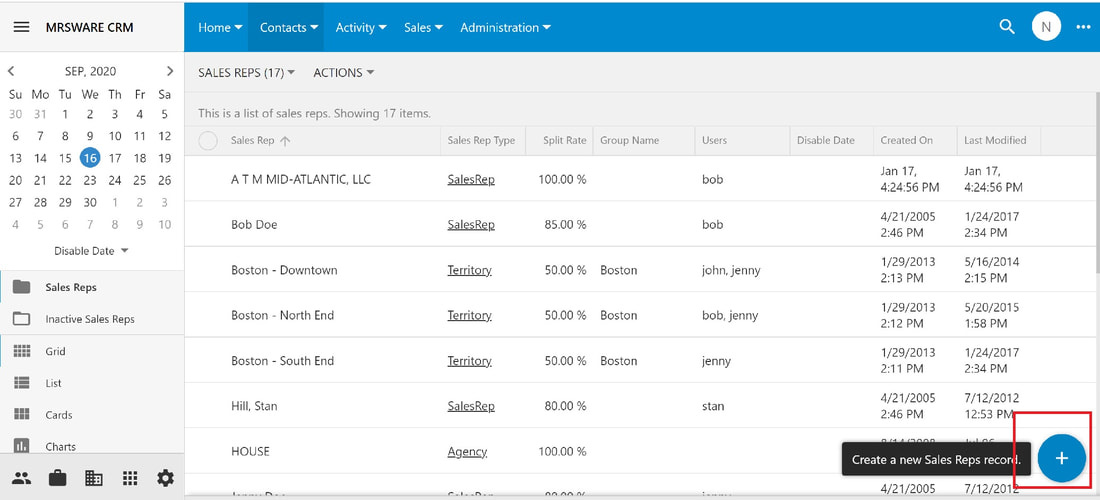
2 - Click or tap on the "Plus" sign on the bottom right of the page to open a New Sales Rep form
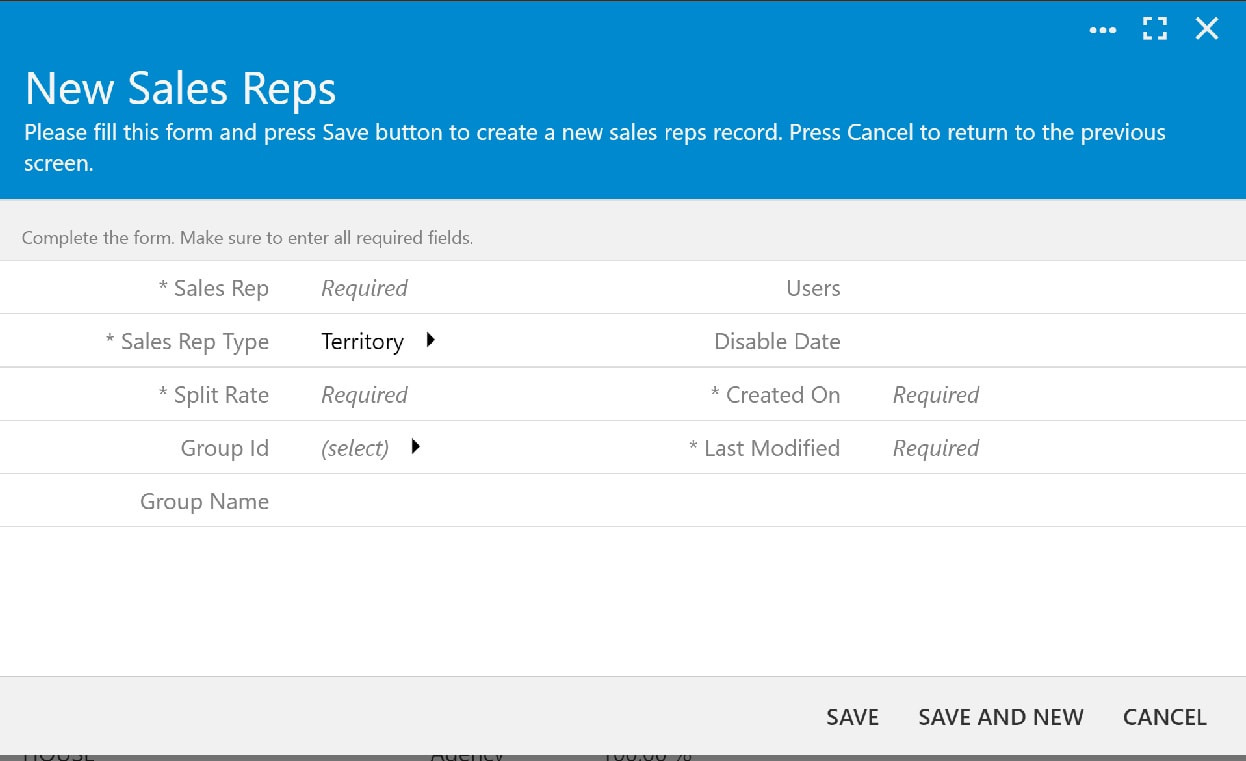
3 - The New Sales Rep form opens
4 - Fill out the form
5 - When finished, click or tap "Save"
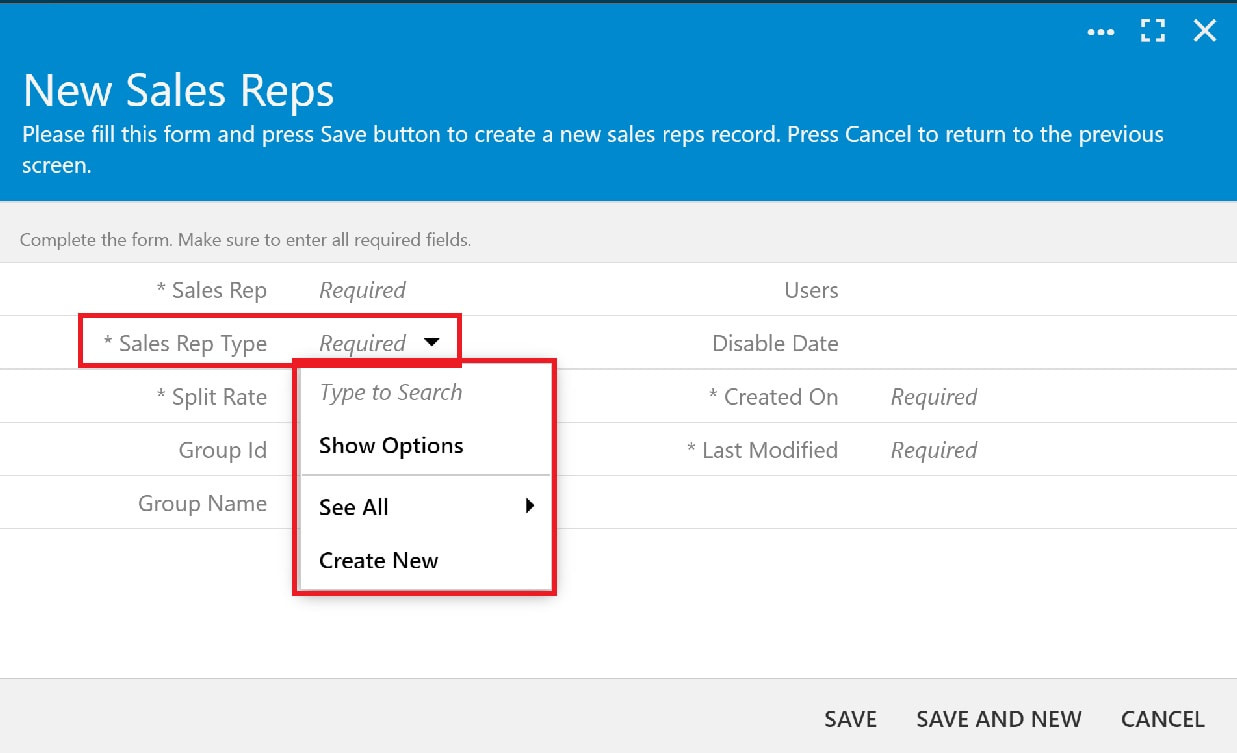
During step 4:
You must select a Sales Rep Type.
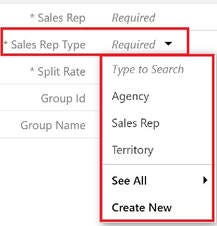
When you tap on "Show Options", you will see the 3 Types:
- Agency - used when Customers are assigned as House accounts
- Sales Rep - used when Customers are assigned to individuals
- Territory - used when Customers are assigned to a geographic area
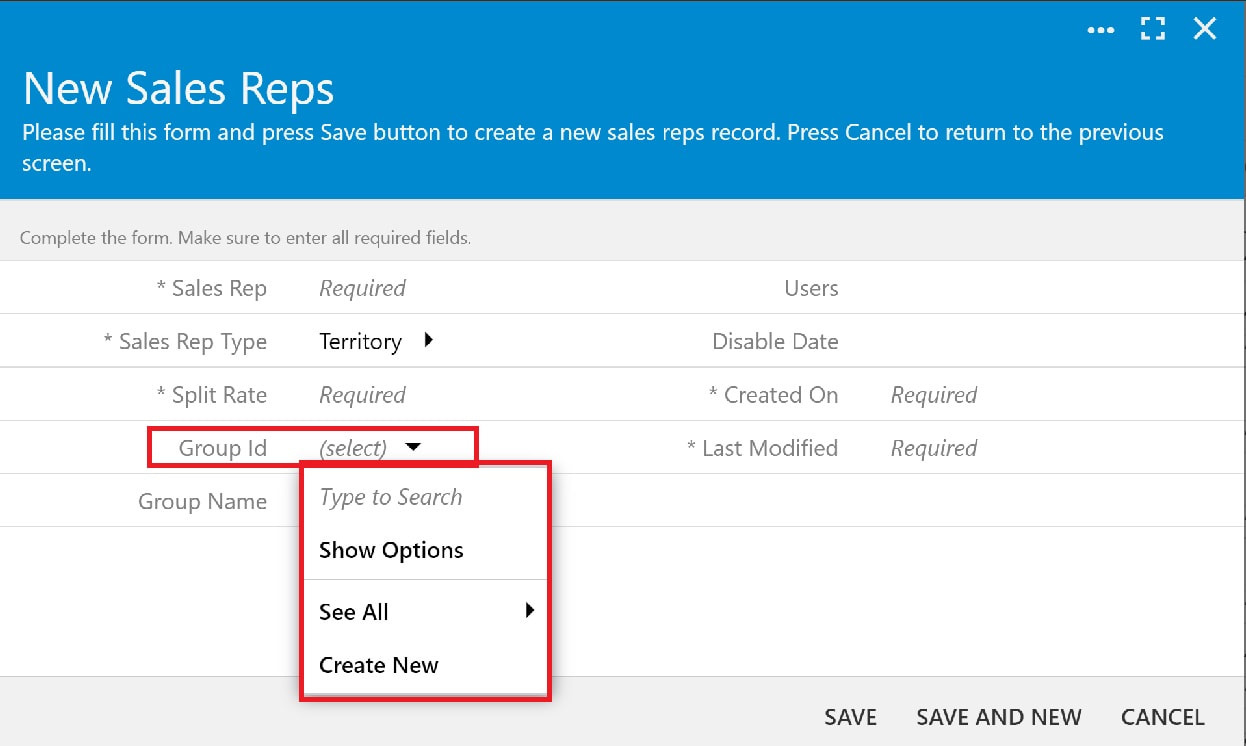
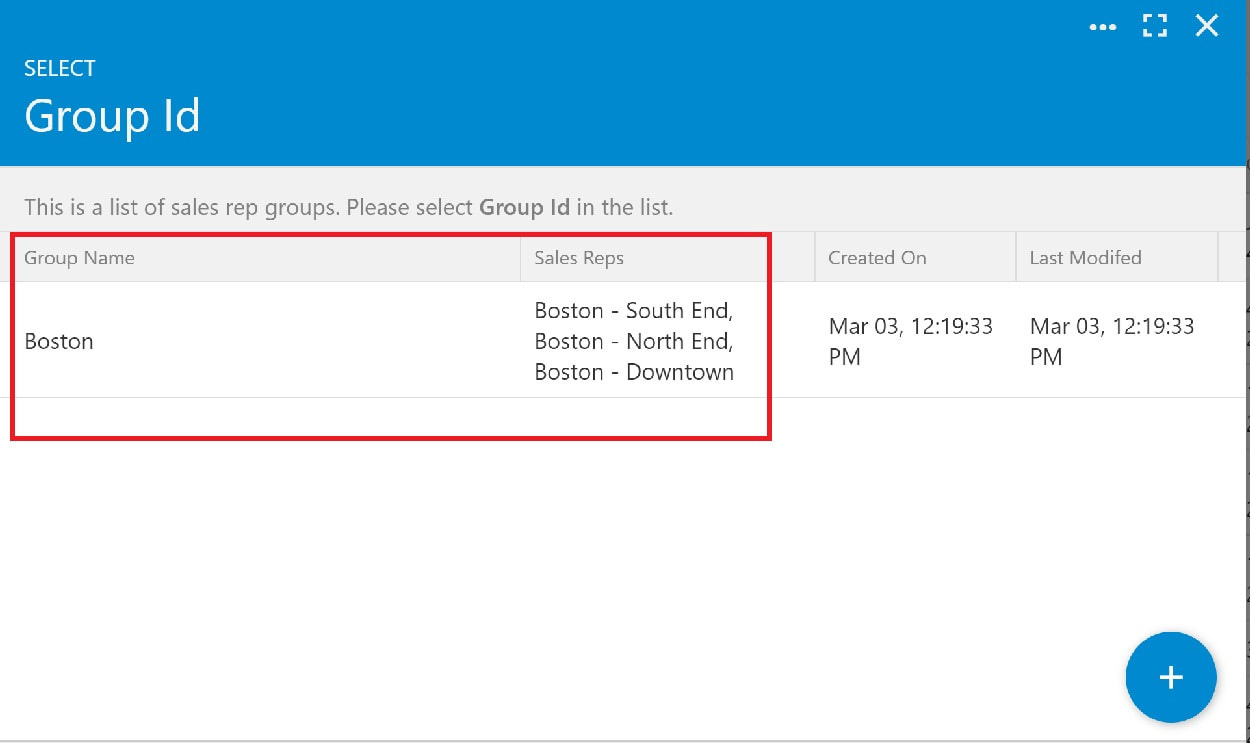
Also, during Step 4:
You have the option of assigning a Group Id and Name.
This is used when Customers are assigned to a Territory.
You can give the Territory a name and assign Sales Reps to the Territory.
Option 2:
1 - Click or tap on the "3 dots" on the right of the Menu bar
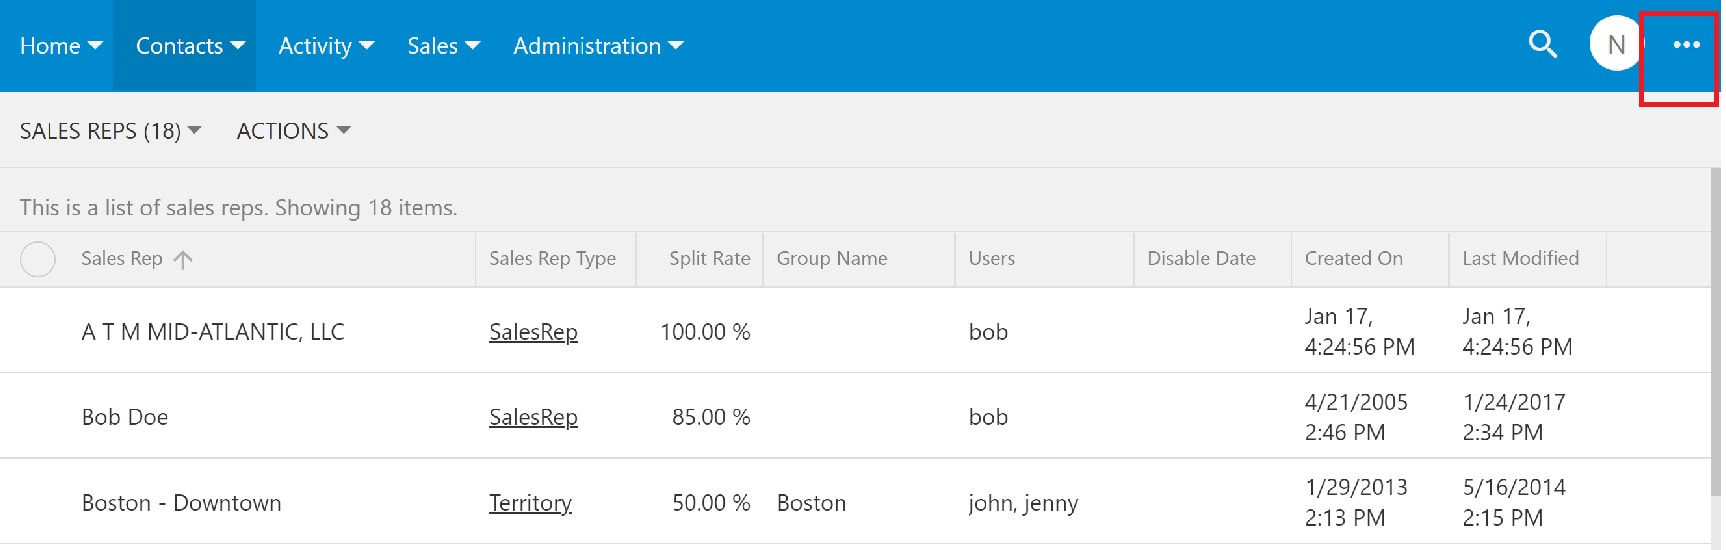
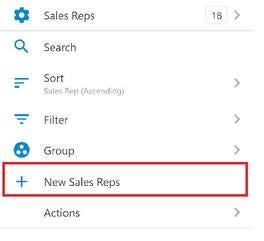
2 - Click or tap on "New Sales Reps" when the slidebar on the right opens to open the New Sales Rep Form
3 - The New Sales Rep form opens.
4 - Fill out the form
5 - When finished, click or tap "Save"
Mobile Options:
Option 1:
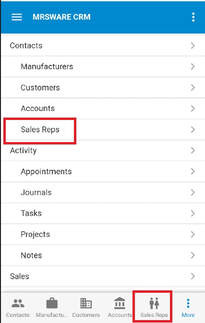
1 - Tap on "Contacts - Sales Reps" on the Menu bar or from the Tab bar (bottom of the page)
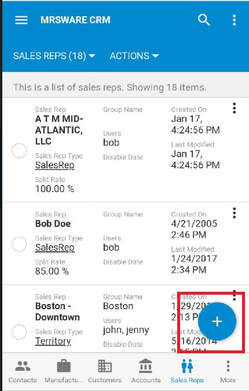
2 - Tap on the "Plus" sign in the Sales Reps table to open a New Sales Rep form.
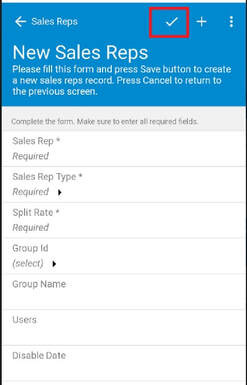
3 - Fill out the form
4 - When finished, tap the "checkmark" on the Menu bar (top of the page) to save the new sales rep
Option 2:
When adding more than one new sales rep:
After completing the first New Sales Rep form
Instead of tapping the "checkmark" to save the new sales rep
1 - Tap the 3 dots to the far top right of the Menu bar on the New Sales Rep form.
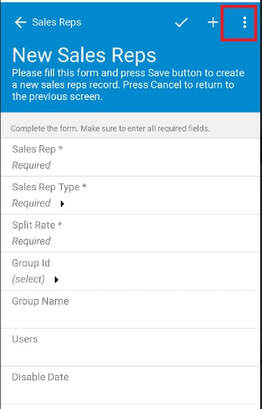
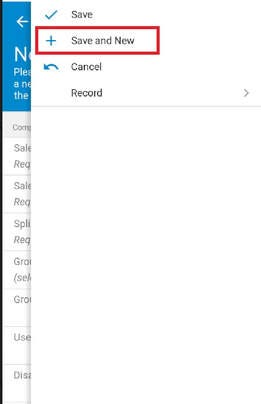
2 - Tap "Save and New" to save the just completed new contact and open a New Sales Rep form.
3 - Fill out the form
4 - Tap the 3 dots to the far top right of the Menu bar on the New Sales Rep form.
Repeat steps 2 and 3
Continue to add new sales reps
When finished
5 - Tap the "checkmark" to save the new sales rep
Or
5 - Tap "Save" on the slidebar menu
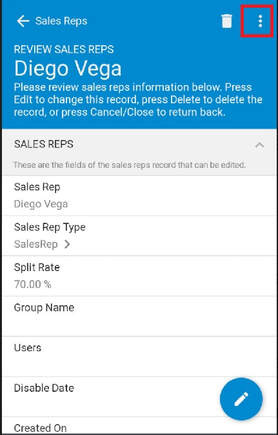
Option 3:
When adding a new sales rep from a Review Sales Rep form:
1 - Tap on the 3 dots on the Menu bar on the Review Sales Rep form
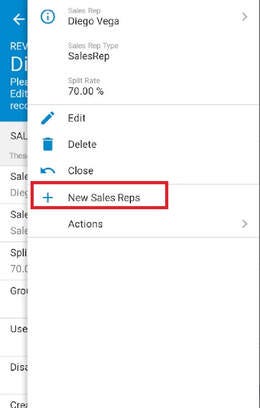
2 - Tap on "New Sales Reps"
3 - Fill out the New Sales Rep form
When finished
4 - Tap the "checkmark" to save the new sales rep
Or
4 - Tap "Save" on the slidebar menu