
When you want to edit a current Sales Rep or Territory, go to "Sales Reps" under the Contacts menu.
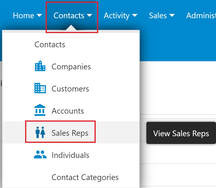
Here's how to edit a current sales rep:
i - As in the MRSware desktop client there is more than 1 way to edit a sales rep
Desktop options
Option 1:
1 - Click or tap "Contacts - Sales Reps" on the Menu bar or Menu list
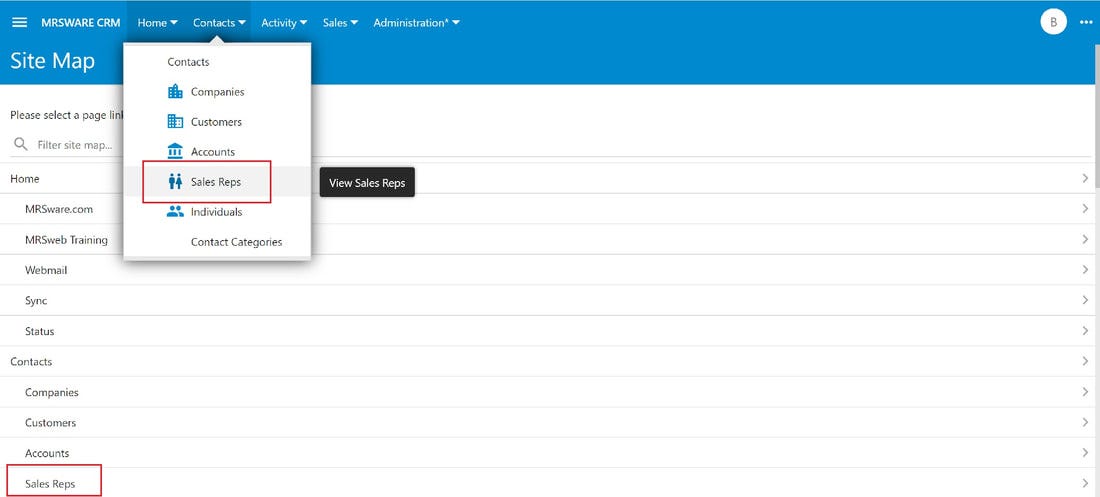
2 - Click or tap a current sales rep to open a Review Sales Rep form
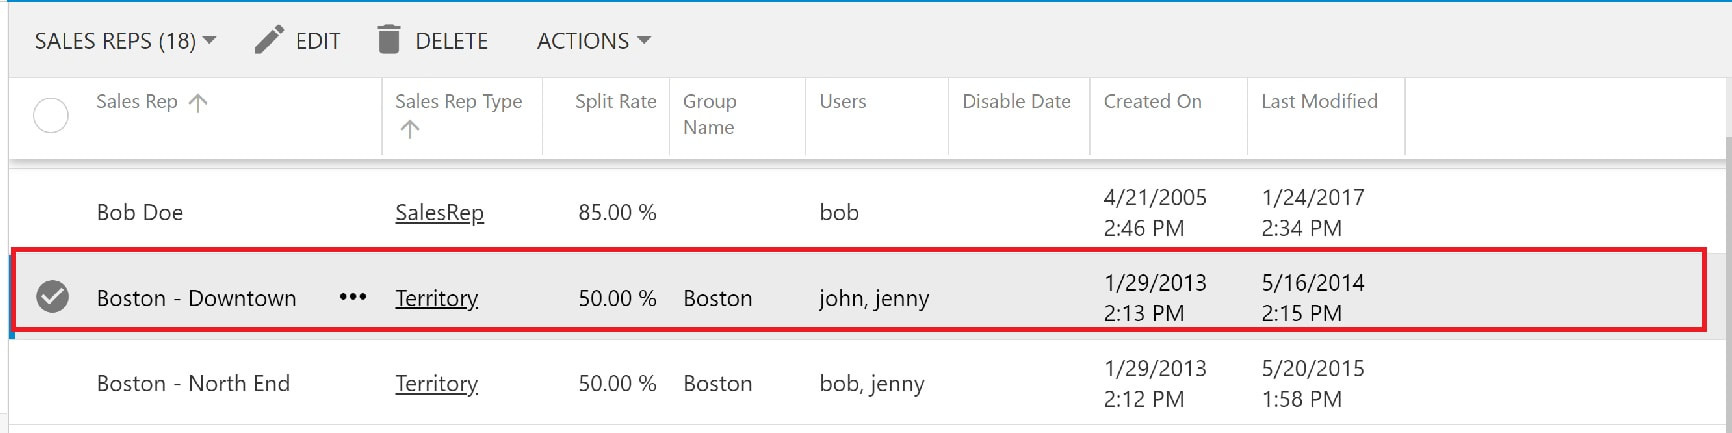
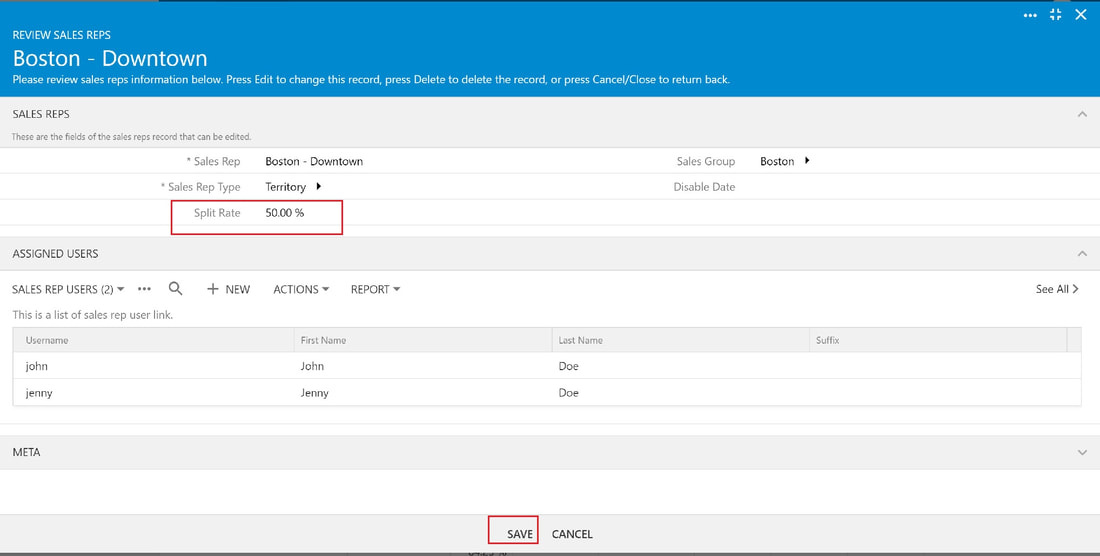
3 - The Review Sales Rep form opens
4 - Click or tap "Edit"
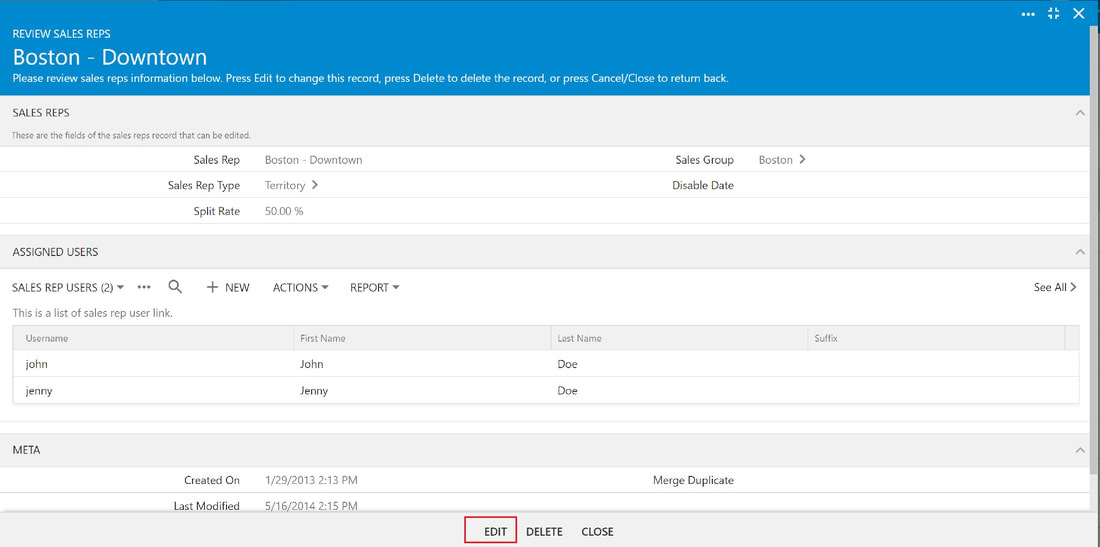
5 - Change or add information to the form
(we changed the Split Rate in the screenshot example to the right)
6 - Click or tap "Save"
Option 2:
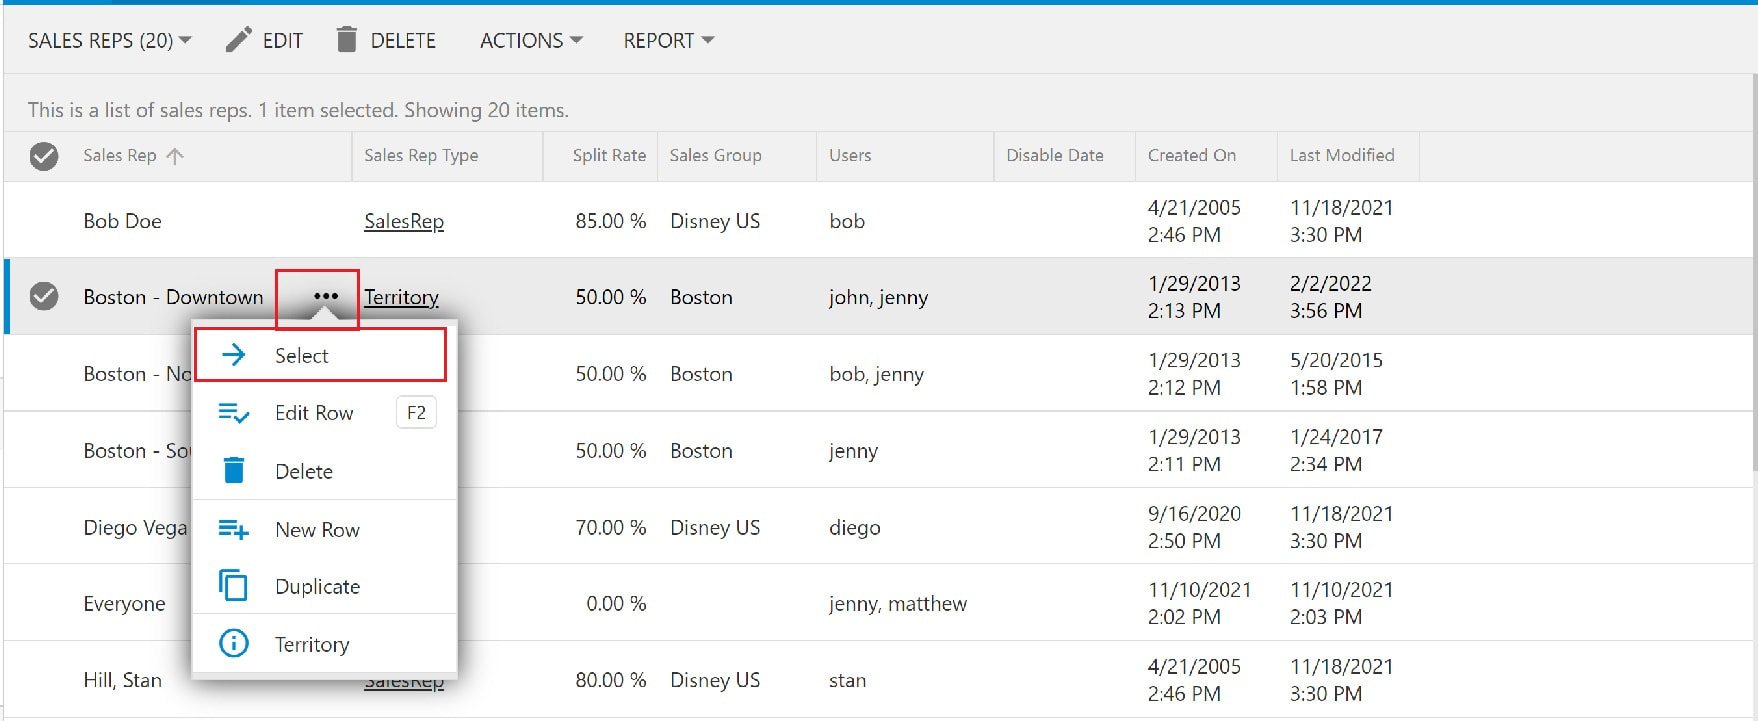
1 - Click or tap the 3 dots icon to the right of a current sales rep
2 - Click or tap "Select" to open a Review Sales Rep form
(see screenshot to the right)
3 - The Review Sales Rep form opens
4 - Click or tap "Edit"
5 - Change or add information to the form
6 - Click or tap "Save"
Option 3:
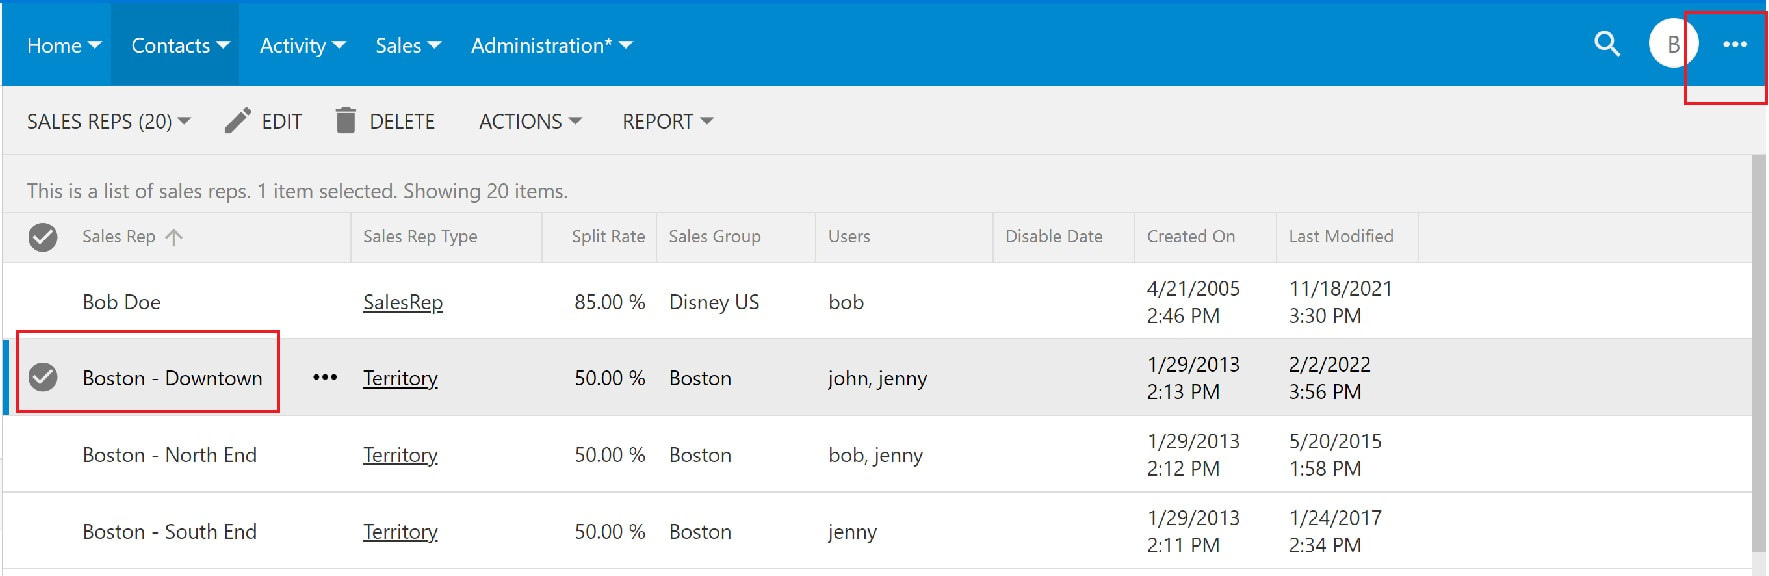
1- Click or tap the sales rep to edit
2 - Click or tap the 3 dots icon on the Menu bar, to the right of your Initial
(see screenshot on the top right)
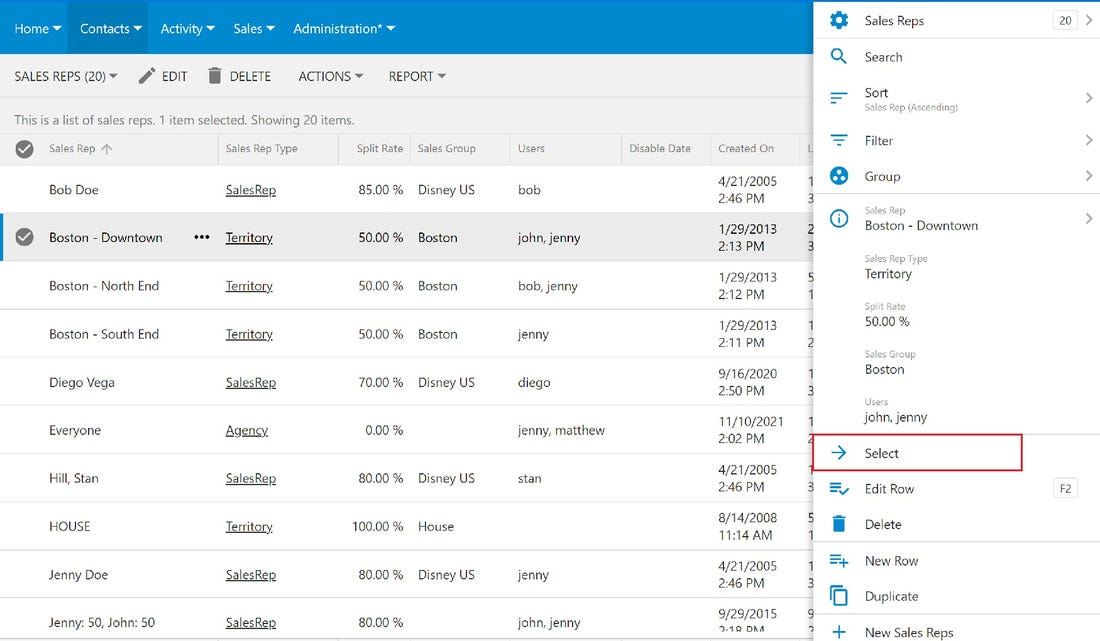
3 - Click or tap "Select" from the Slidebar menu to open a Review Sales Rep form
(see screenshot on the bottom right)
4 - The Review Sales Rep form opens
5 - Click or tap "Edit"
6 - Change or add information to the form
7 - Click or tap "Save"
Mobile options:
Option 1:
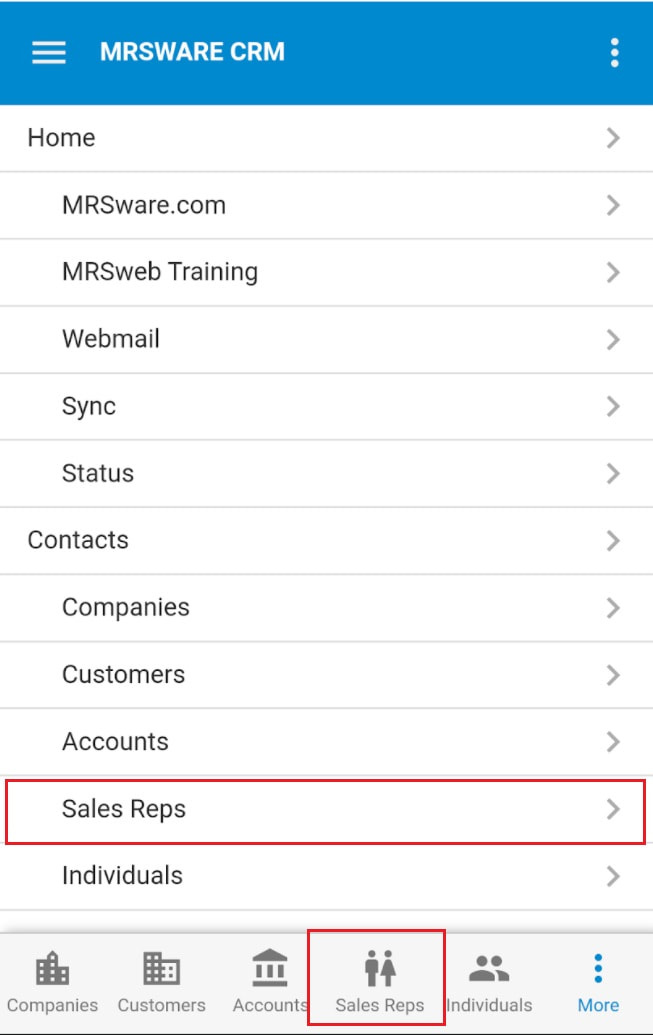
1 - Tap "Contacts - Sales Reps" on the Menu list or "Sales Reps" in the Tab bar (screenshot below left)
2 - Tap a current sales rep
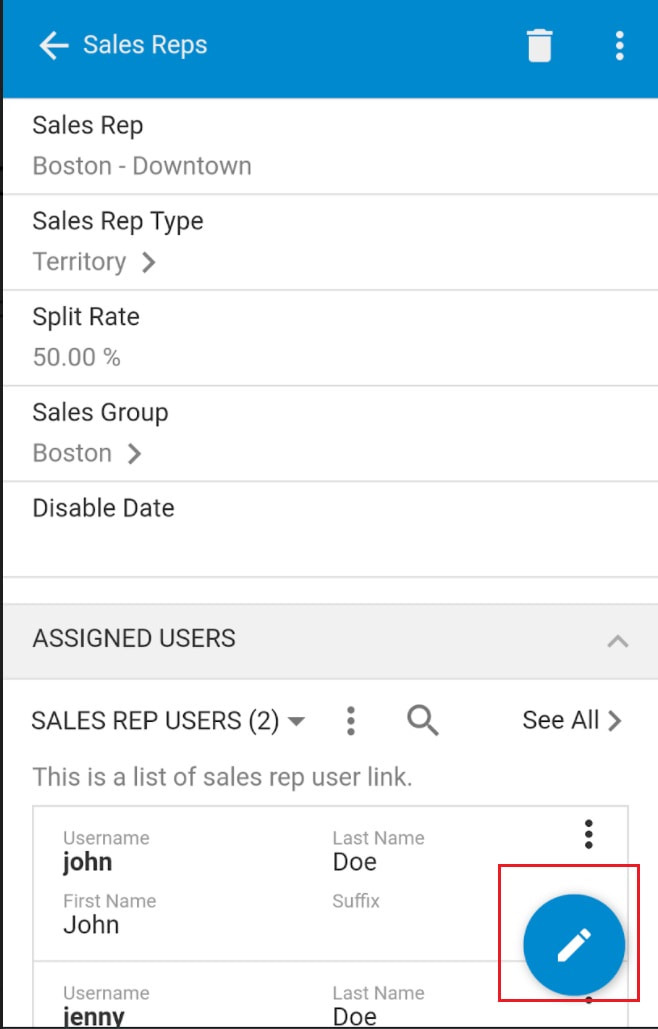
3 - The Review Sales Rep form opens
4 - Tap the pencil icon (Edit) in the bottom right of the page (see the screenshot below middle)
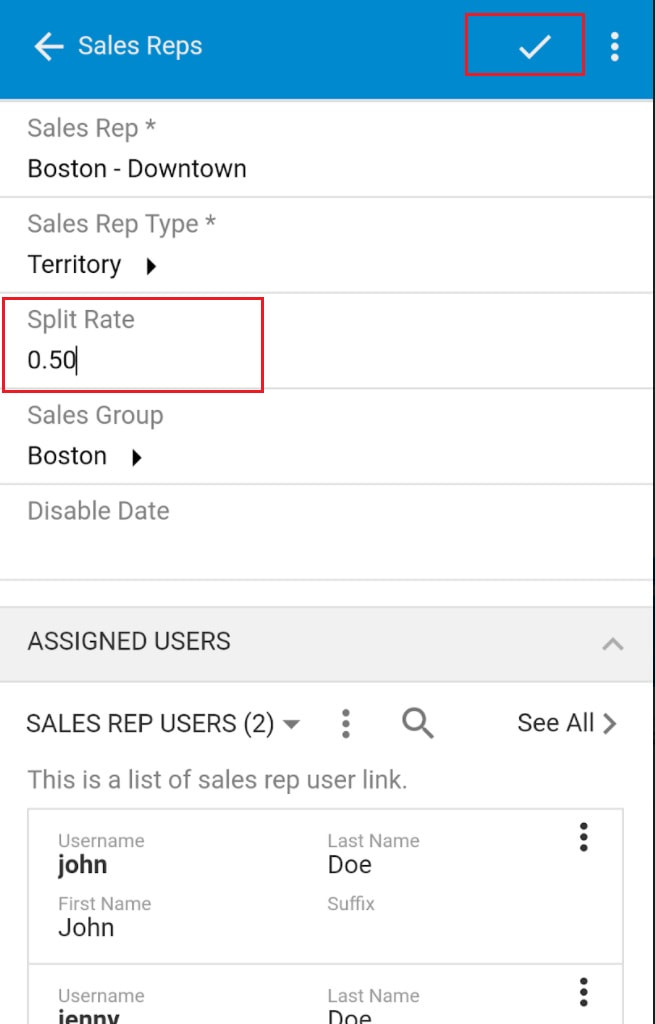
5 - Change or add information to the form (we changed the Split Rate in the screenshot example below right)
6 - Tap the checkmark (Save) at the top right (see the screenshot below right)
Option 2:
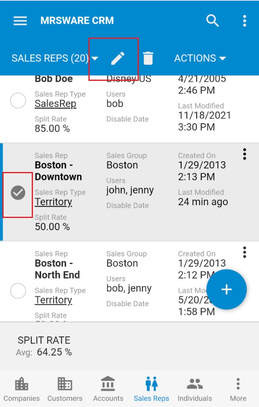
1 - Tap the circle, to the left of a current sales rep
2 - Tap the pencil icon (Edit) on the Menu bar (see the screenshot to the right)
3 - The Review Sales Rep form opens
4 - Change or add information to the form
5 - Tap the checkmark (Save)
Option 3:
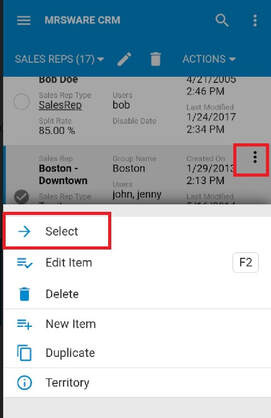
1 - Tap the 3 dots to the right of a current sales rep
2 - Tap "Select" on the Slidebar from the bottom of the screen (screenshot to the right) to open a Review Sales Rep form
4 - The Review Sales Rep Form opens
5 - Tap the pencil icon (Edit)
4 - Change or add information to the form
5 - Tap the checkmark (Save)
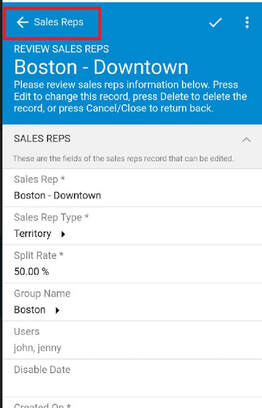
i To get back to the Sales Rep listing, without making any changes, tap the back arrow at the top of the Edit page.