In MRSweb, you can sort and filter in tables to see your data in a variety of ways. Sorting data makes it easier to see and review the data displayed. Filtering data separates out the unwanted information, hiding the information that doesn't meet your filter criteria.
Sort
Sorting data makes it easier to see and review the data displayed.
Here's how to sort in a table:
In the Grid view you can sort by any of the column headers.
In the examples shown, we want to sort the sales rep names alphabetically A to Z.
Option 1:
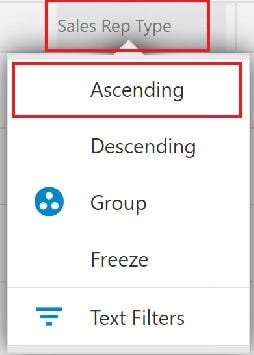
To sort by a column header:
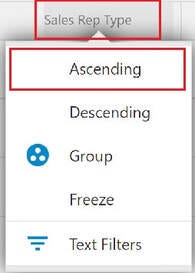
1- Tap or right-click a column header (Sales Rep Name)
2 - Select "Ascending" from the pop-up menu
i When the Sort order is applied, you will see an arrow in the column header, indicating your selection choice (e.g. an up arrow means Ascending; a down arrow means Descending).
i Sort menu options will be slightly different, depending on the column header.
Option 2:
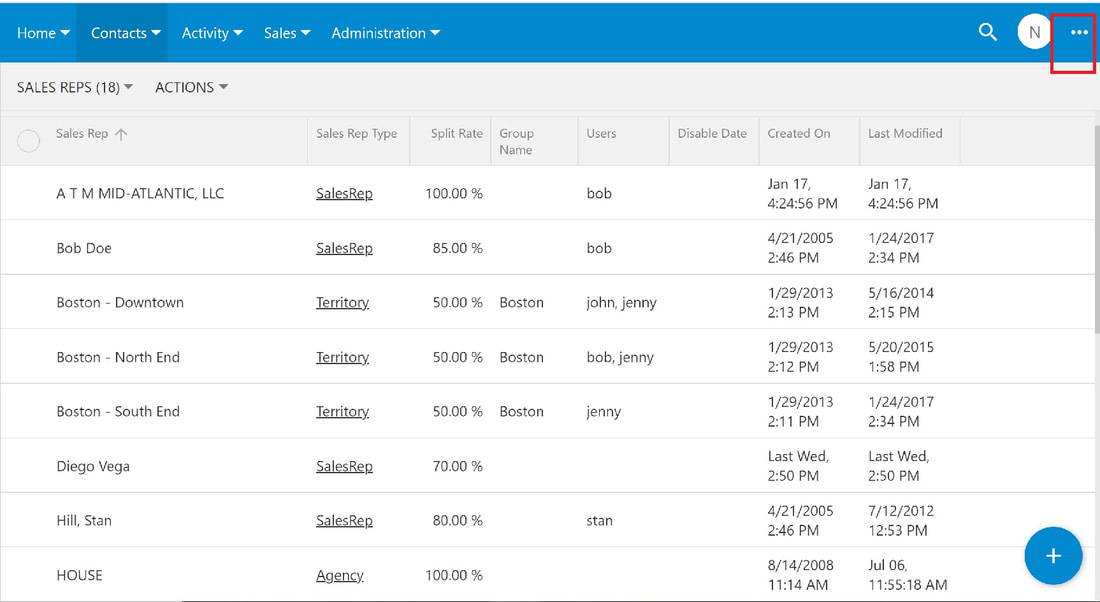
1. Tap or click the 3 dots on the far right of the Menu bar.
A slidebar opens with menu options.
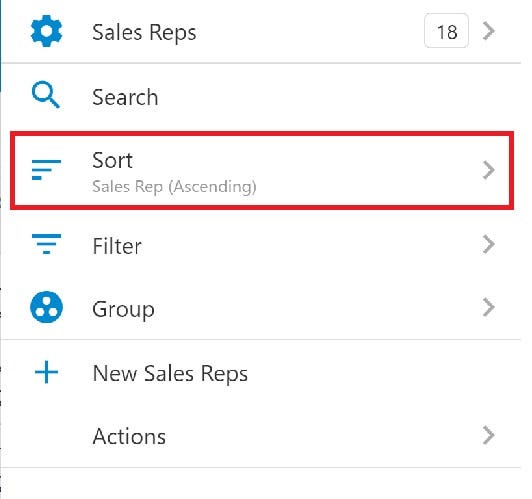
2. Tap "Sort"
A slidebar opens with a list of the column headers.
3. Tap "Sales Rep"
A slidebar opens with the options for sorting the column selected.
4. Tap one of the sort options.
(in our example we selected "Ascending". Note the checkmark next to our selection.)
5. Tap "Apply"
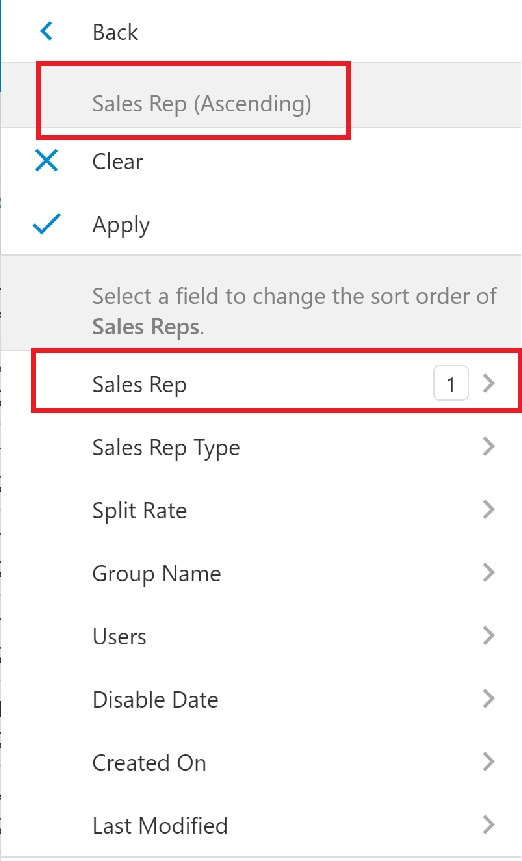
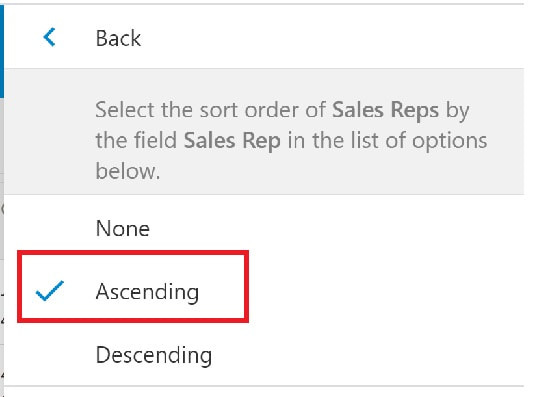
The screenshot seen below is sorted by Sales Rep (Ascending) so that the listing displays sales rep names alphabetically A to Z.
Note the up arrow in the Sales Rep column header.
Filter
Filtering data separates out the unwanted information, hiding the information that doesn't meet your filter criteria.
Here's how to filter in a table:
In the examples shown, we want to filter to show only the Sales Rep Type - Territory.
Option 1:
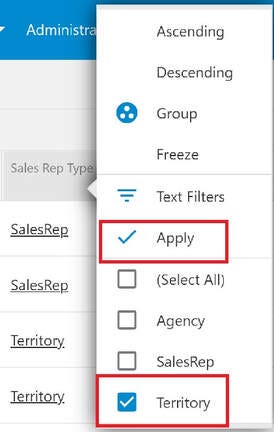
1. Tap or left-click the column header
(in our example, we chose "Sales Rep Type")
2. Tap or click a selection
(in our example we chose "Territory")
3. Tap or click "Apply"
Option 2:
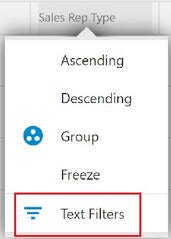
1. Tap or right-click the column header, select "Text Filters"
(in our example we chose "Sales Rep Type")
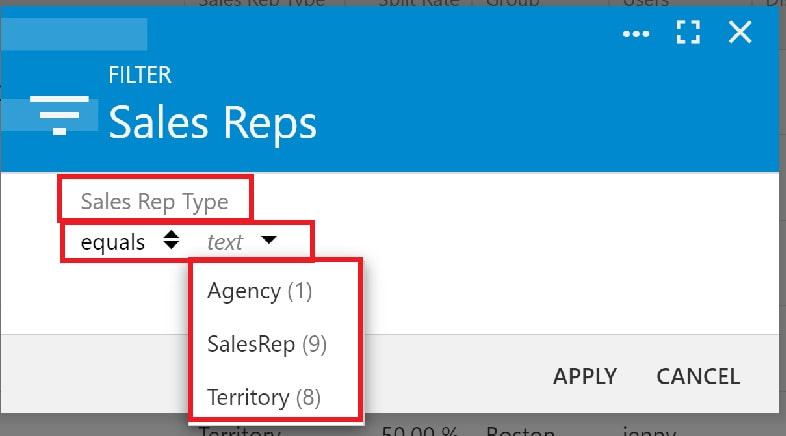
A Filter dialog opens.
2. Tap or click the up/down arrows next to "equals" to view the options
(in our example we chose "equals")
3. Tap or click the down arrow next to "Text" to view the Sales Rep Type options.
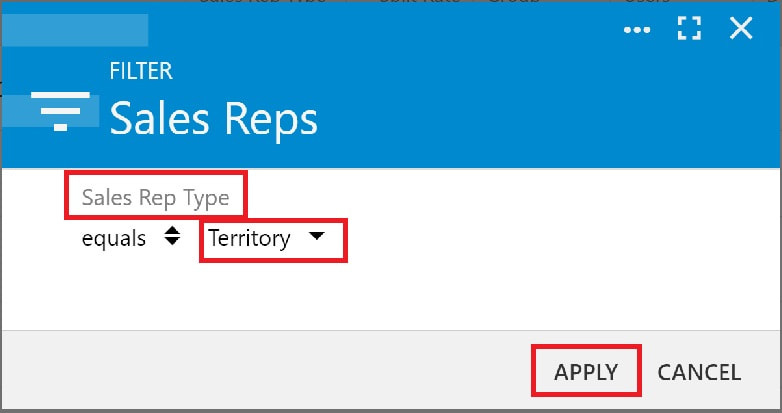
3. Select your Sales Rep Type option.
(in our example we chose "Territory")
4. Tap or click "Apply".
Option 3:
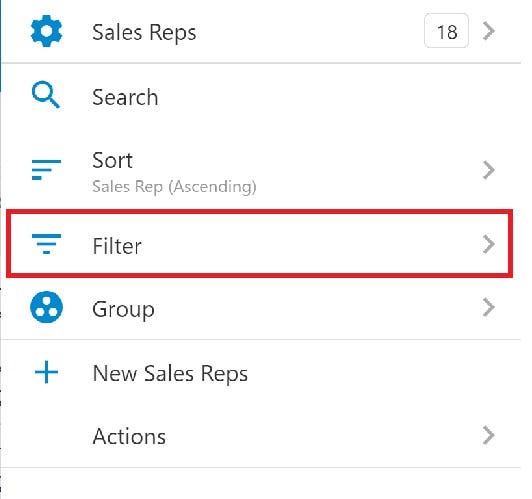
1. Tap or click the 3 dots on the far right of the Menu bar.
A slidebar opens with menu options.
2. Tap or click "Filter"
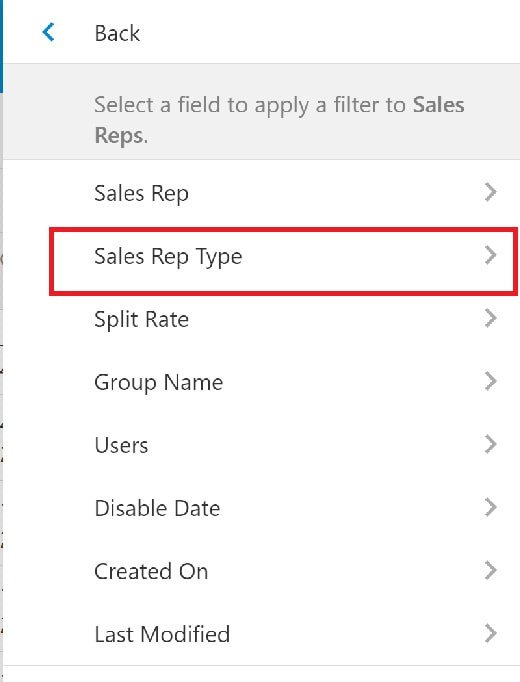
A slidebar opens with a list of the column headers.
3. Tap or click "Sales Rep Type"
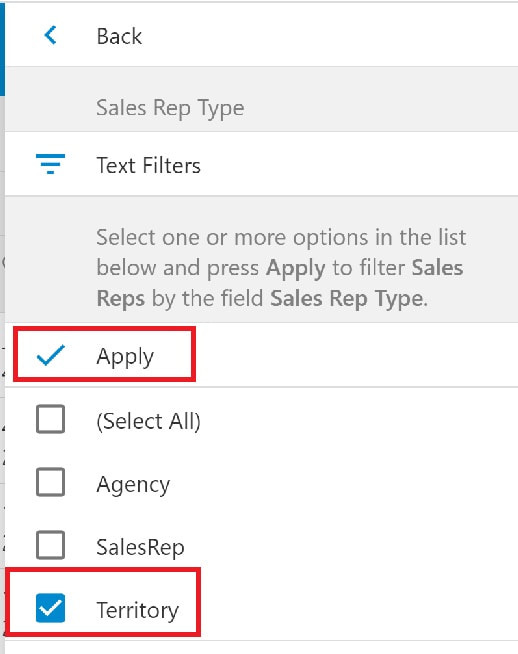
A slidebar opens with the options for filtering the column selected.
4. Tap or click one of the filter options.
(in our example we selected "Territory". Note the checkmark next to our selection.)
5. Tap "Apply"
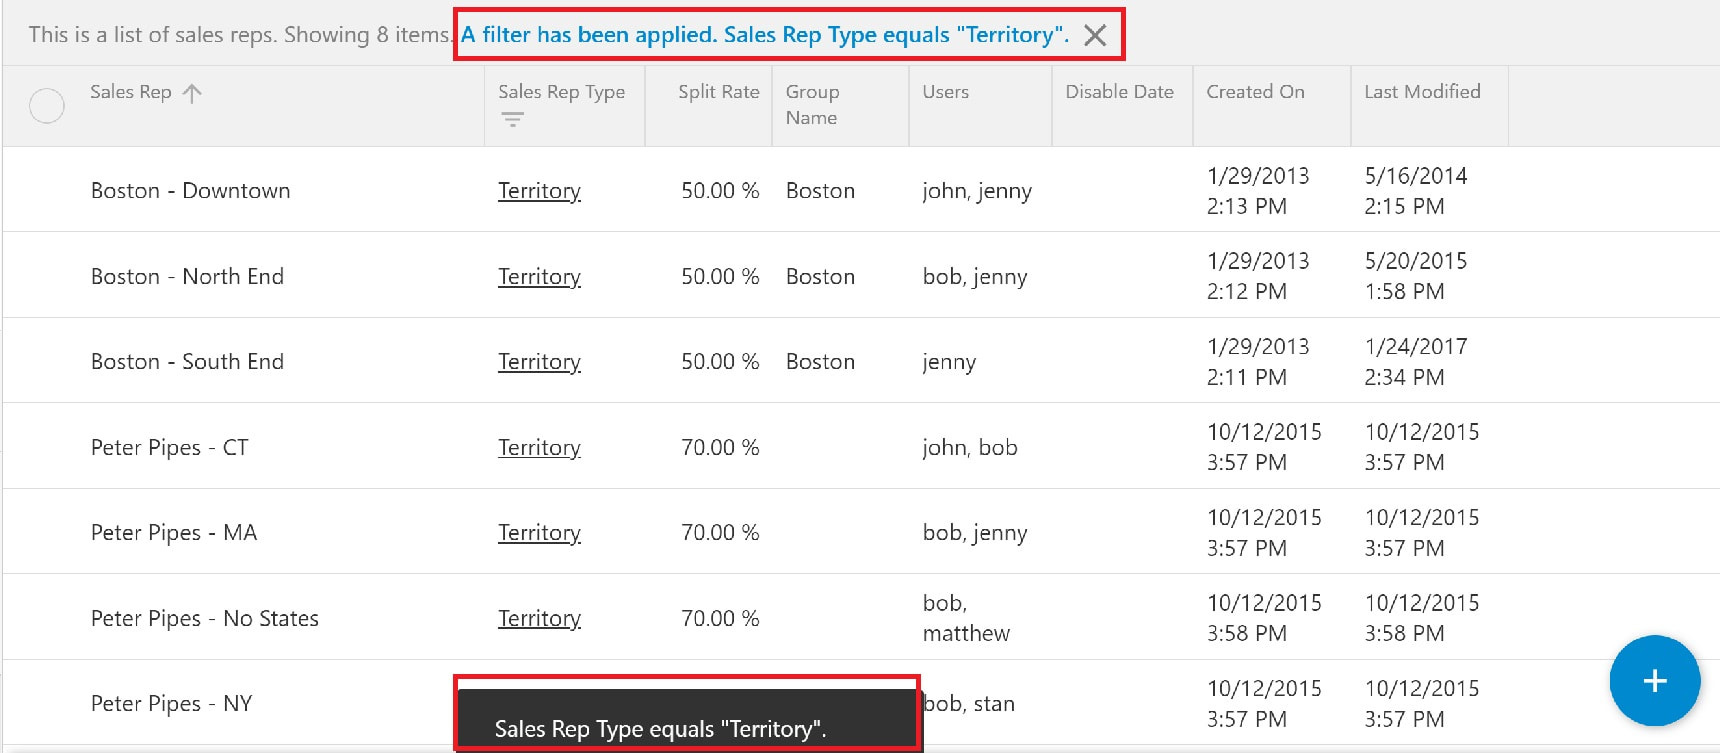
In the screenshot below, the table is now filtered by the Sales Rep Type "Territory" so that the listing displays only the Territories that have been set up.
Note the filter explanation above the table and the notification pop-up at the bottom center of the screen.