
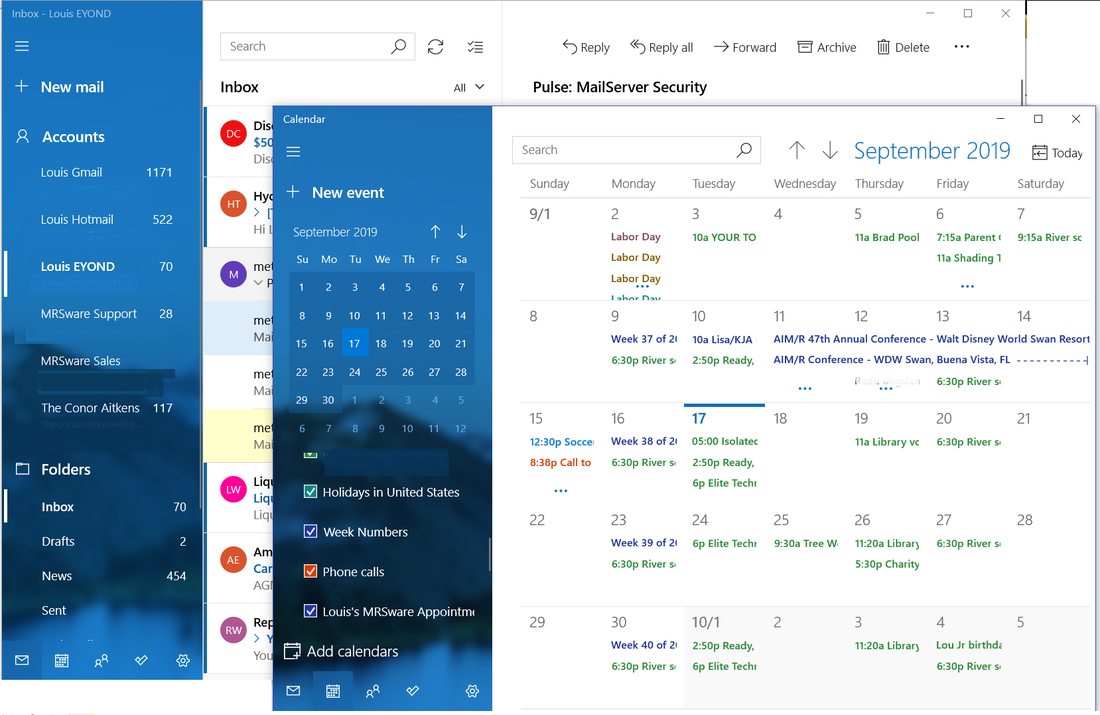
Windows 10 Mail is the free, pre-installed email client that comes with Windows 10. Just like you would use your pre-installed email app on your phone or tablet, you can use this free and included Email program on your Windows Desktop to connect to your MRSware Mailbox(es). Some of the nice features that it allows for is integrated desktop alerts that pop-up and then park themselves in the Windows notification panel. It also has an integrated Calendar program that can sync your calendars from various sources, including MRSware Sync, to provide a unified events view.
MRSware Settings
The settings you will need are the same as you use on your phone, namely the IMAP settings for your company. This includes using your email address and Mailbox password, which can be set separately and differently than your MRSware Desktop password. To get your specific company settings, please contact MRSware Support or ask your company's MRSware Administrator.
Likewise, to sync your Calendar to Windows 10 Mail, make sure your Administrator as added the Sync settings for your account, and can provide you with the login they created for your when doing so.
The settings you will need are the same as you use on your phone, namely the IMAP settings for your company. This includes using your email address and Mailbox password, which can be set separately and differently than your MRSware Desktop password. To get your specific company settings, please contact MRSware Support or ask your company's MRSware Administrator.
Likewise, to sync your Calendar to Windows 10 Mail, make sure your Administrator as added the Sync settings for your account, and can provide you with the login they created for your when doing so.
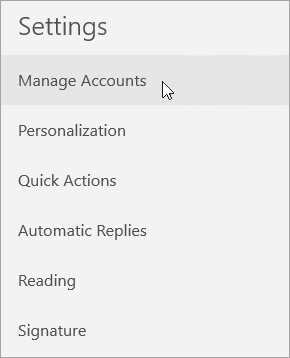
| Windows 10 Mail Setup Instructions To add your company's email to Windows 10 Mail, you add an Account using your IMAP settings, the same settings used to setup your phone and tablet. Here are the steps: 1. Open the Mail app by clicking the Windows Start menu and choosing Mail. 2. If this is the first time using Mail, click the "Add account" link; if you already have set up another email address, like your personal email, click the Settings icon then choose Manage Accounts, then click the "Add account" link. | 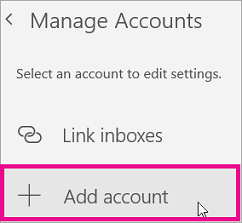
 |

| |
| 3. Under Add an account, scroll down to see the "Advanced setup" option and select it. | 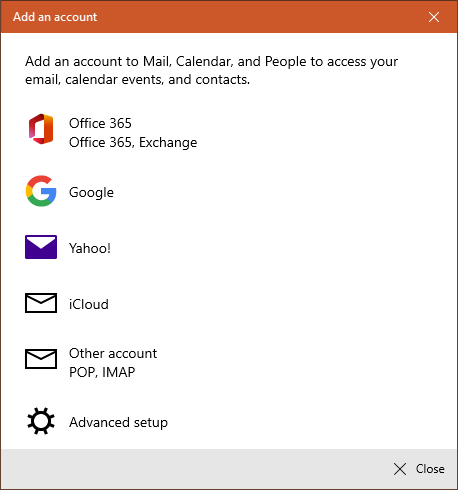 |
| 4. Select "Internet email... IMAP" on the Advanced setup menu. | 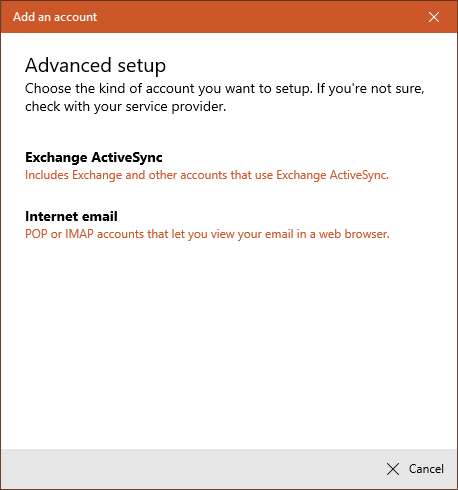 |
|
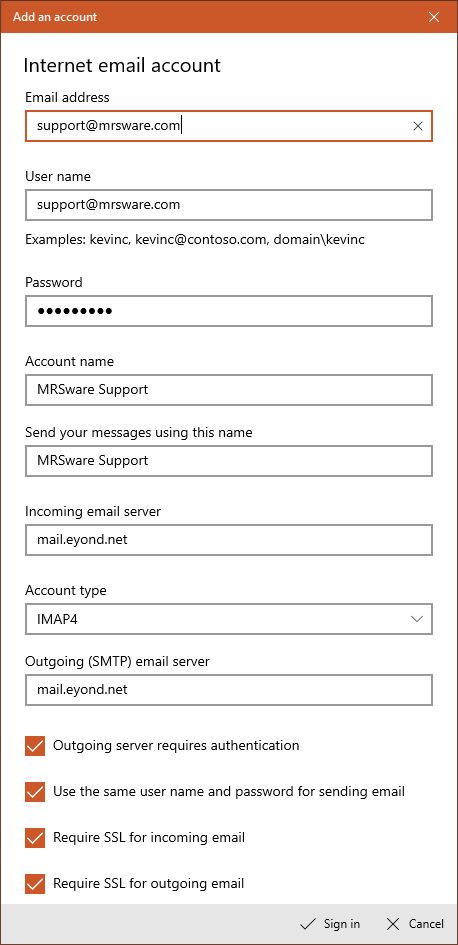
5. Fill in the Internet email account settings dialog with the information shown at the right. Replace our example Email address with your work email address, your User name with your Email address again, and enter your Mailbox Password.
Note: Mailbox Password can be set different than your MRSware Desktop login password. If you get an "Incorrect Username or Password" message, it is most likely the case that you have the wrong password. Your admin in your office can reset this password for you, or feel free to contact MRSware Support to do the same. The Account name field can be filled in with anything you like, choose something descriptive to differentiate it from other accounts that you may also set up in Windows 10 Mail. Send your messages using this name is how recipients of your emails will see your name. These same settings work for all email programs. If your email program asks for port numbers, the correct entries are: IMAP (SSL) incoming = 993 SMTP (SSL) outgoing = 465 |
|
6. Click the Sign in button to verify your settings and add your account.
At this point you are done and will see your new email account in the list of Accounts on the left-side of the Mail app. Click on your newly added account to see the Inbox and all your messages, matching what you see in MRSware. Due to the magic of IMAP, any changes your make in the Mail app will also be reflected in MRSware Desktop, and any other email apps your use, including ones on your phone and tablet -- everything will show the same everywhere you look.
At this point you are done and will see your new email account in the list of Accounts on the left-side of the Mail app. Click on your newly added account to see the Inbox and all your messages, matching what you see in MRSware. Due to the magic of IMAP, any changes your make in the Mail app will also be reflected in MRSware Desktop, and any other email apps your use, including ones on your phone and tablet -- everything will show the same everywhere you look.