
One of the advantages of using a CRM system is the ability to aggregate data. One of the best ways to form a group is to use terms or attributes to define a company, individual, appointment, journal, or project. In MRSweb, these attributes are called categories.
Categories are attributes created and assigned by you to aid in searches (think of them as keywords for your searches and grouping). In MRSweb you will find categories for Contacts, Appointments, Journals, and Projects. Each of these areas has its own Categories list, so that you can have entries that just apply to that area.
When setting up and using categories it is important that all Users in your company be consistent in their use.
Categories are attributes created and assigned by you to aid in searches (think of them as keywords for your searches and grouping). In MRSweb you will find categories for Contacts, Appointments, Journals, and Projects. Each of these areas has its own Categories list, so that you can have entries that just apply to that area.
When setting up and using categories it is important that all Users in your company be consistent in their use.
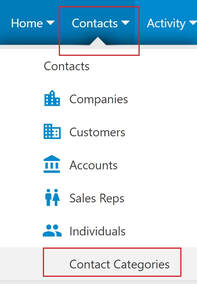
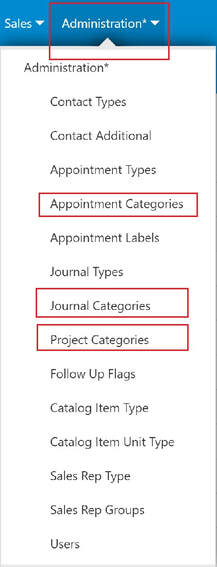
Categories can be found in two different areas in MRSweb:
|
|
 |  |
When you create a contact category, it can be assigned to either a company or an individual.
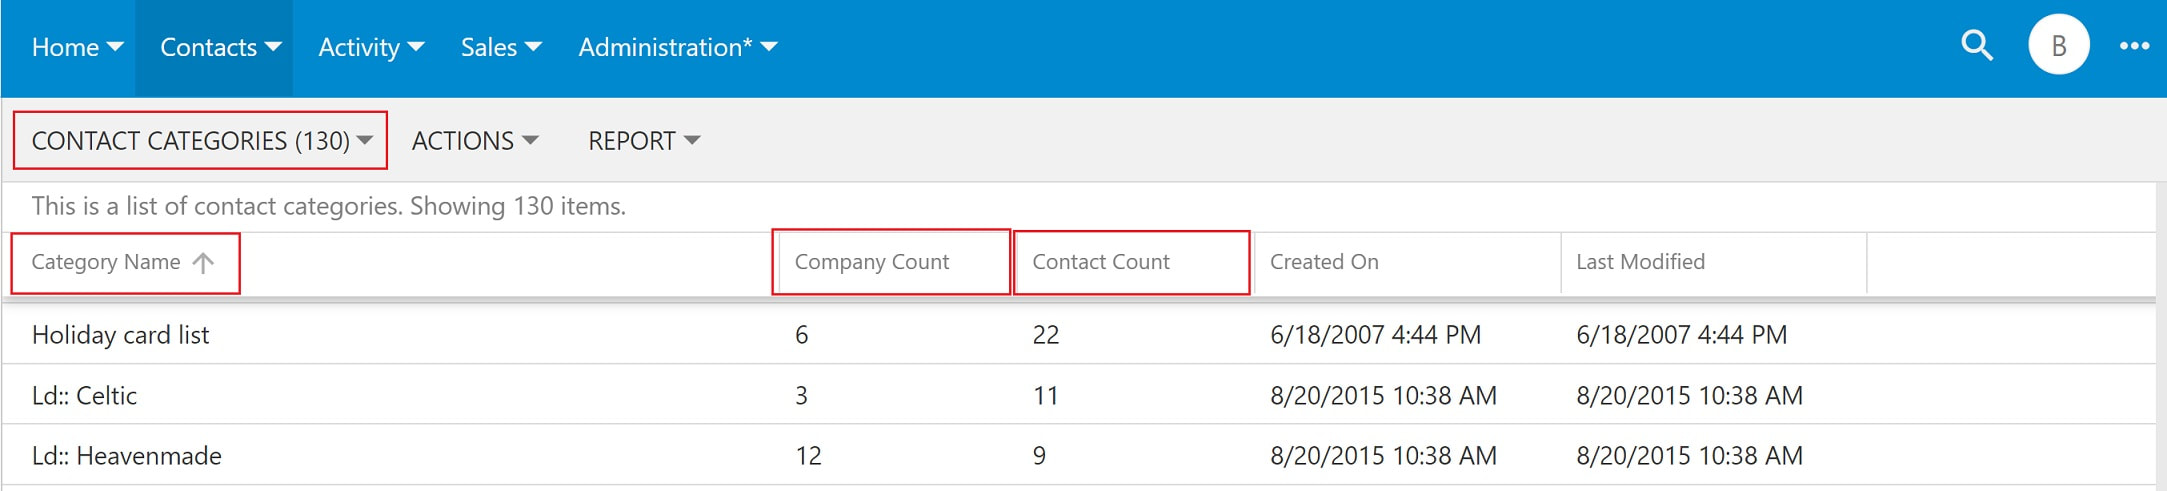
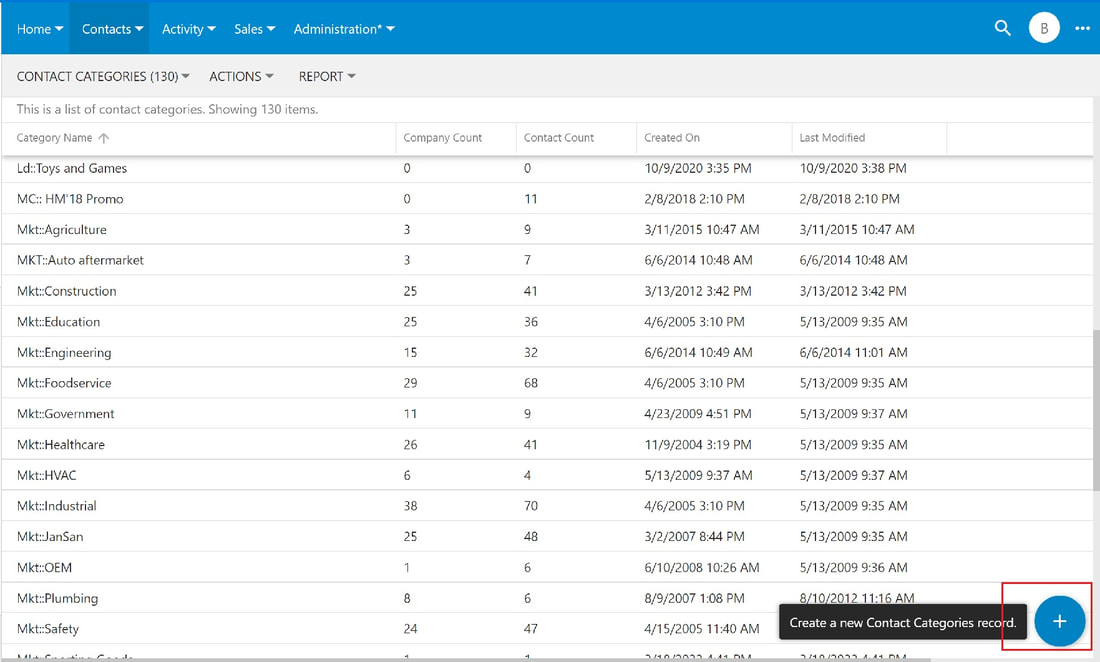
In the screenshot below, the Company Count displays the number of companies that are assigned to the category and the Contact Count displays the number of contacts that are assigned to the category.
In the screenshot below, the Company Count displays the number of companies that are assigned to the category and the Contact Count displays the number of contacts that are assigned to the category.
How to create a new category in Contact Categories:
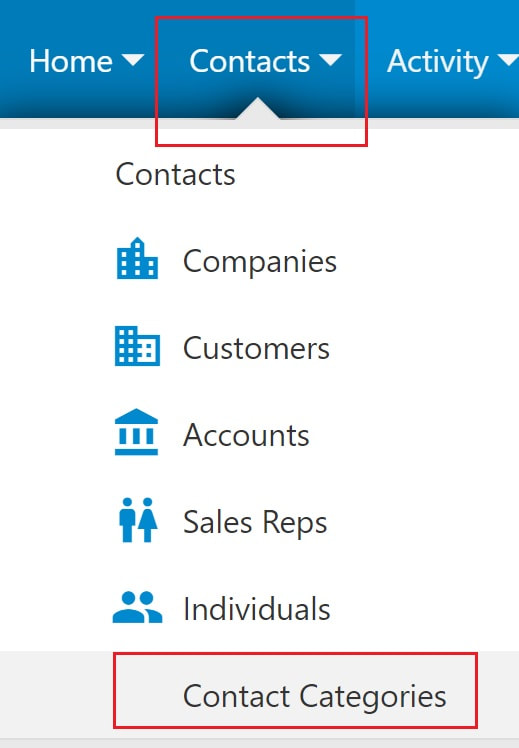
1 - Go to the Contacts menu and select "Contact Categories"
2 - When the Contact Categories list opens, click or tap the blue "Plus" sign to create a new category
1 - Go to the Contacts menu and select "Contact Categories"
2 - When the Contact Categories list opens, click or tap the blue "Plus" sign to create a new category
 |  |
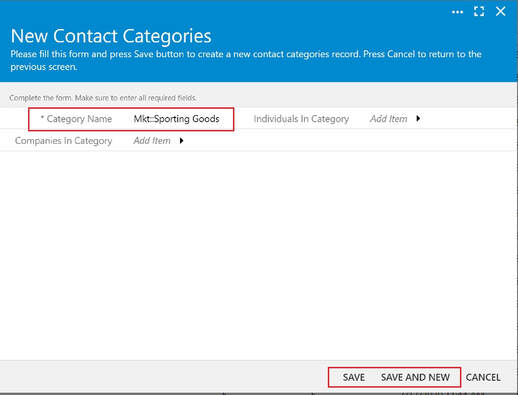
3. When the New Contact Categories form opens, type the name in the "Category Name" field
4. Click or tap "Save" or "Save and New" if you are going to add another category.
Once you assign the category to a company or contact (individual) the Count will reflect the change in the table.
(see below)

To create a new category in Administration:
1. Go to the Administration menu and select either "Appointment Categories" or "Journal Categories" or "Project Categories"
Follow the same steps (2 - 4) as above.