
Sometimes you will find that an account number on a customer is incorrect. Perhaps it was caused by importing incorrect account numbers from a manufacturer. It could also be a case of wanting to change over from a previously used internal account number, or "short name", to the manufacturers' actual account number for the customer.
As part of the precautions from deleting information that is still in use, the system will not let anyone delete an Account Number that is currently in use on an invoice. The following steps will guide you through the process of reassigning invoices to a different account number -- one that you intend to keep -- so that the no longer desired account number can be removed from the system.
As part of the precautions from deleting information that is still in use, the system will not let anyone delete an Account Number that is currently in use on an invoice. The following steps will guide you through the process of reassigning invoices to a different account number -- one that you intend to keep -- so that the no longer desired account number can be removed from the system.
| Here are the steps: 1. In the Shortcuts panel, click on "Customers" 2. On the menu bar, click on "Customers -> Account View" 3. In the Customer Listing table, review the account numbers for each customer. When you find an incorrectly assigned account number, right click on the account number and select "Edit" | 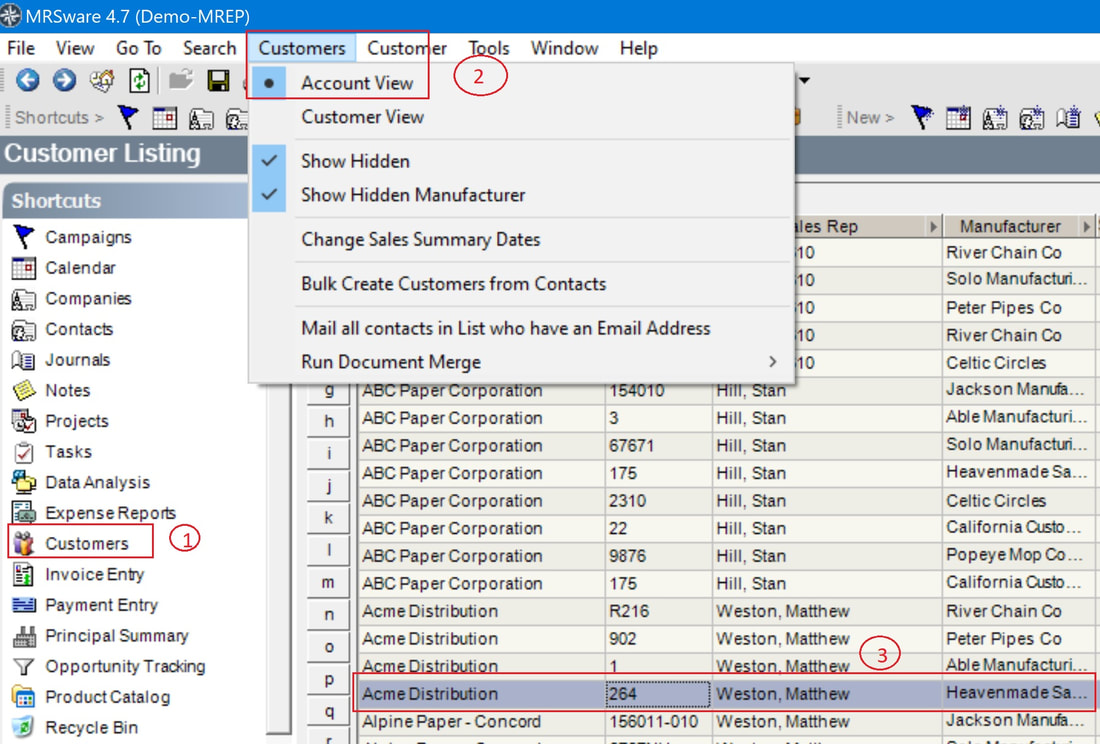 |
| 1. In the Edit Customer dialog, click on the incorrect account number 2. Enter "DONOTUSE" after the incorrect account number 3. Click "Save" 4. Click "Save and Close" | 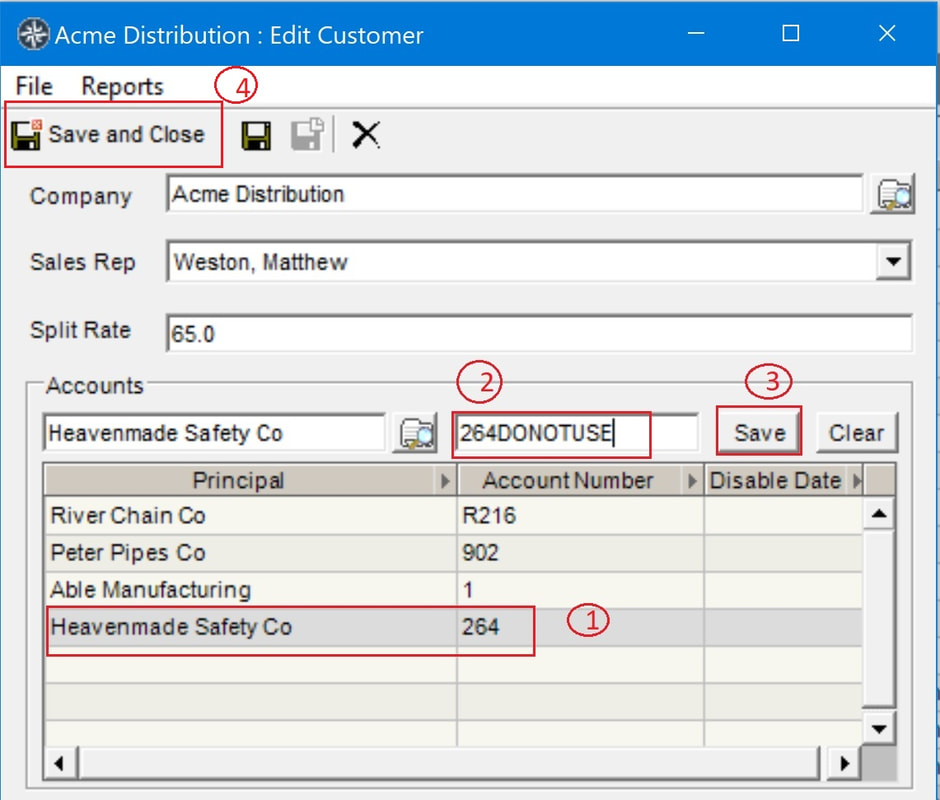 |
| 1. In the Customer Listing table, right click on the Customer to whom the account number is supposed to be assigned and select "Edit" 2. In the Edit Customer dialog, add the Principal name and the Account number to his list 3. Click "Add" to put the Account number in the list 4. Click "Save and Close" | 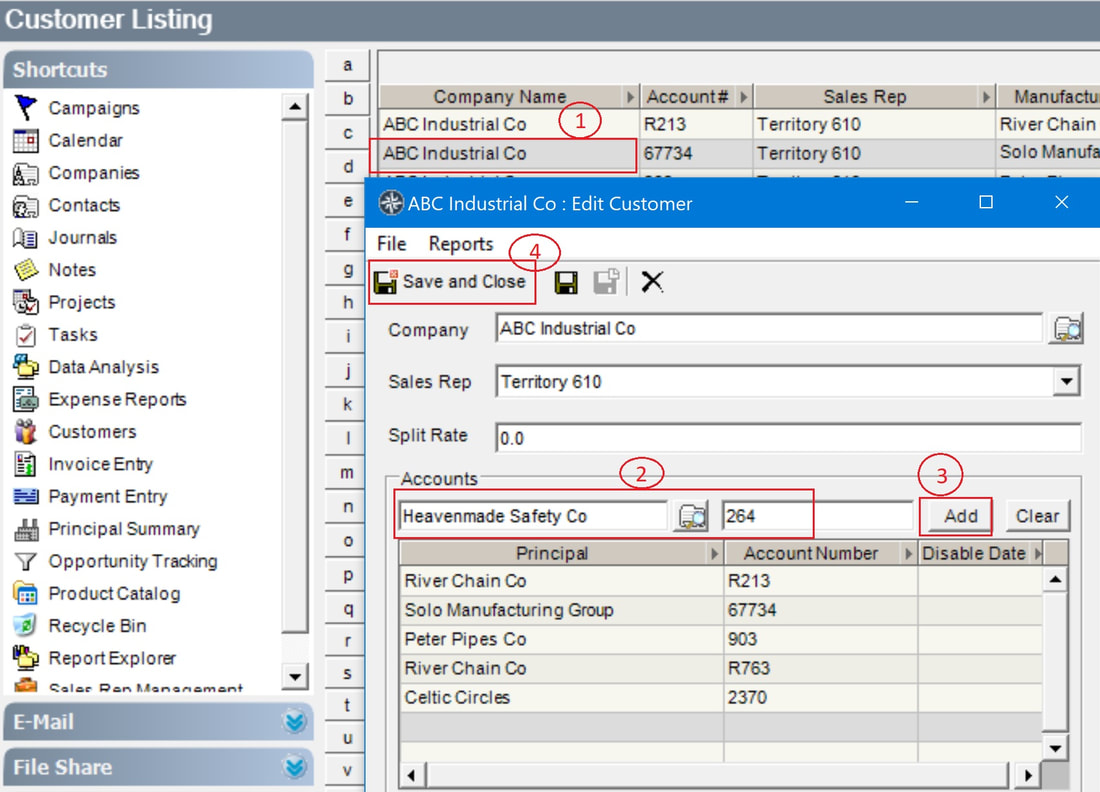 |
| 1. On the menu bar, click on "Search -> Invoices" | 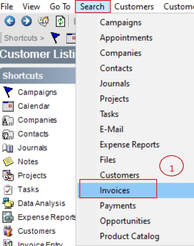 |
| 1. In the Advance Invoice Search dialog, enter the DONOTUSE account number in the Account field 2. Check the box, in the lower left corner "Show results in a separate window" (optional) 3. Click "Ok" | 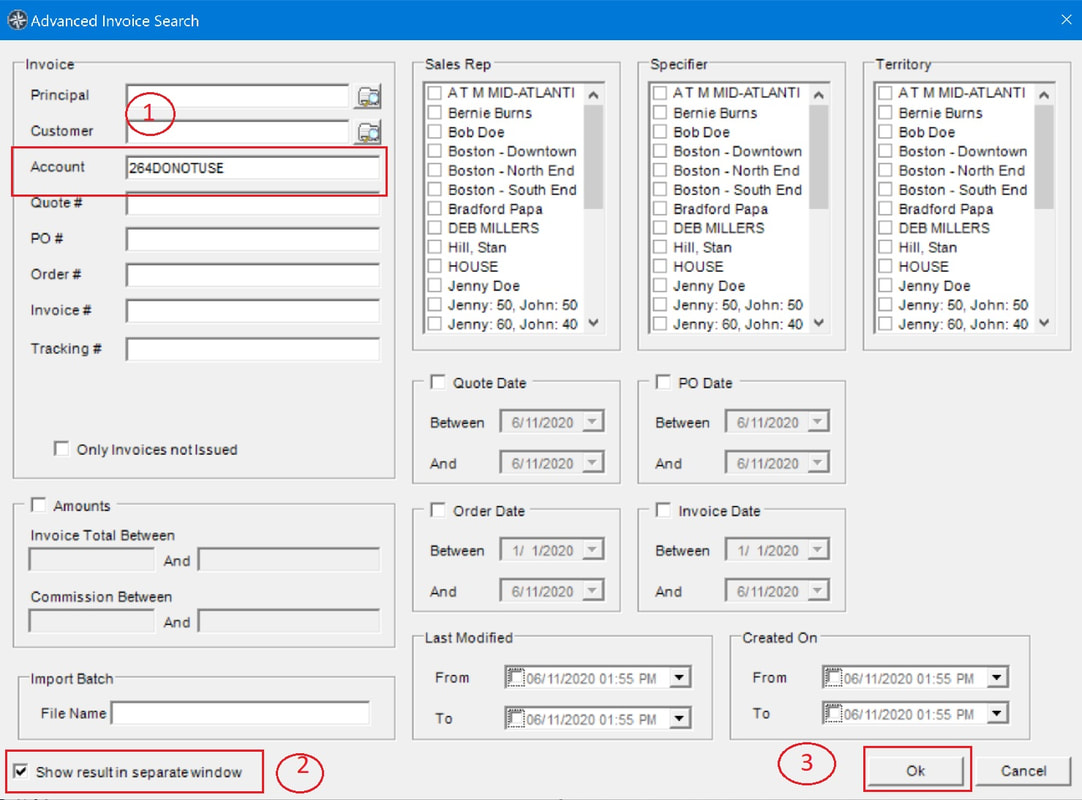 |
| 1. When you get the search results back, verify all the results are for the same customer. 2. Right click anywhere in the invoice table, and select “Table -> Select All”. | 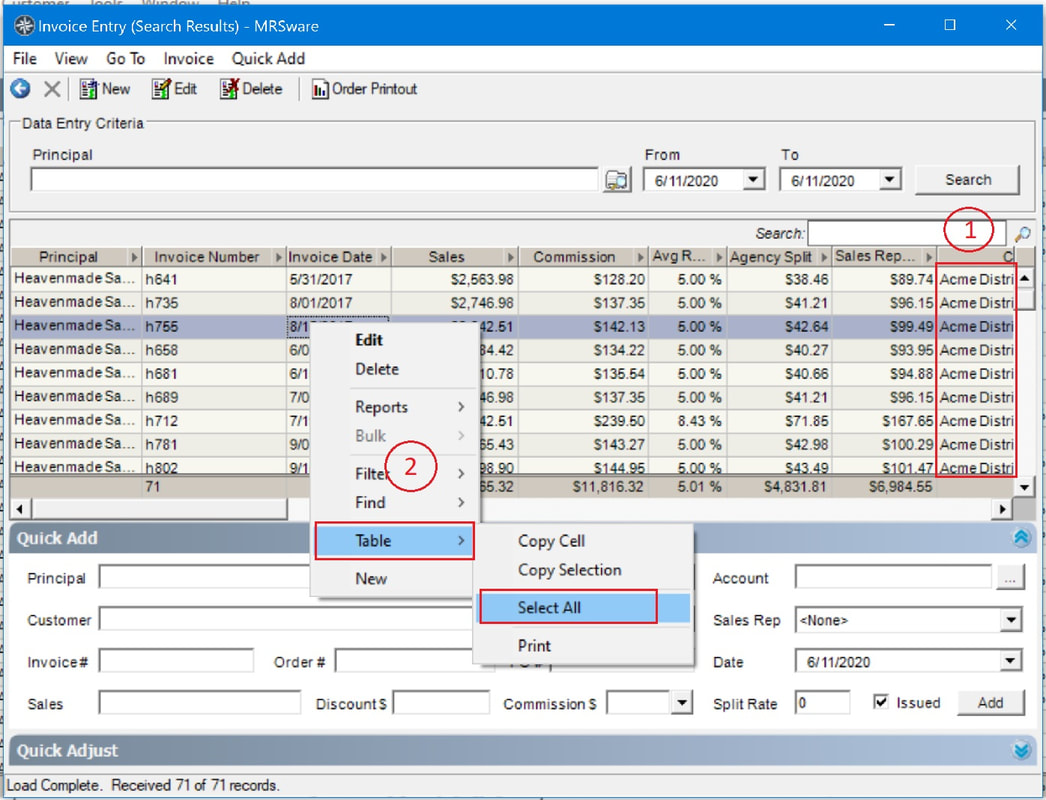 |
| 1. With all the rows now selected, right click on the table again and choose “Bulk -> Assign Customer”. | 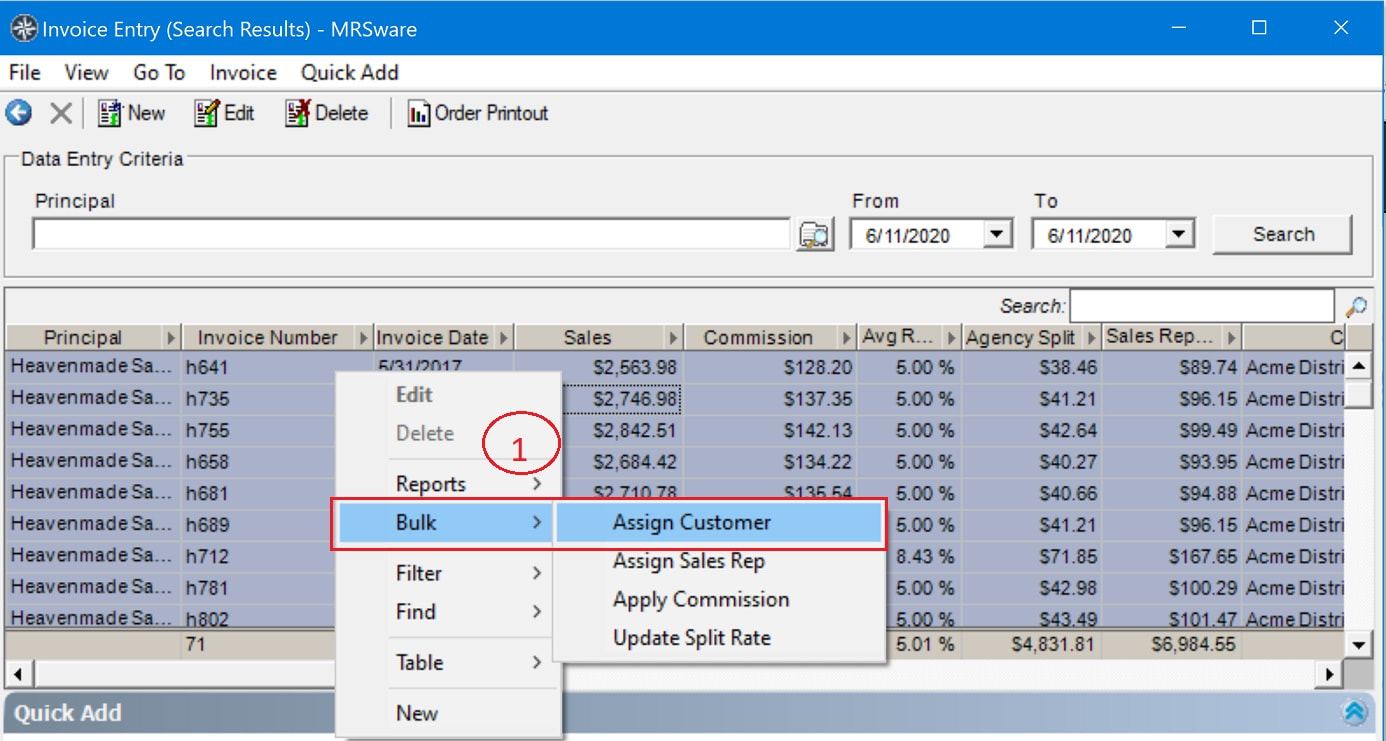 |
| 2. In the Bulk Assign Customer dialog, enter the correct account number in the Account field and press the "Tab" key on your keyboard. 3. Verify that the correct customer contact loads into the selector 4. Click “Save” | 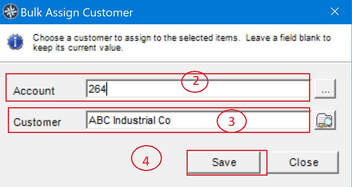 |
| This will begin the process of reassigning all the invoices to the new Customer and Account Number combination. If there are a large number of invoices, it will take some time to complete, please be patient. * Look on the right side of the screen, in the Customer column to see the correct Customer Name being assigned one row at a time. | 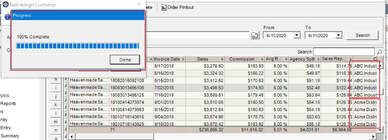 |
| 5. A pop up dialog will open asking if you are sure you want to assign the customer these orders. Click "Yes" | 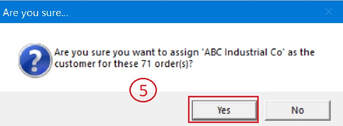 |
| 6. When the process is complete a pop up dialog will notify you that the orders have been updated. Click "Ok" | 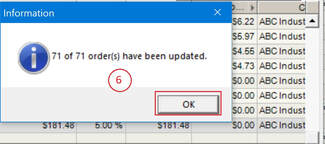 |
| 1. With all the invoices reassigned, return to the Customer Listing table and find the customer with the DONOTUSE account number. Right click on the DONOTUSE Customer and select "Edit" 2. In the Edit Customer dialog, right click on the DONOTUSE Account number and select "Delete" 3. Click "Save and Close" With no invoices assigned to this account any longer, it should save without errors. | 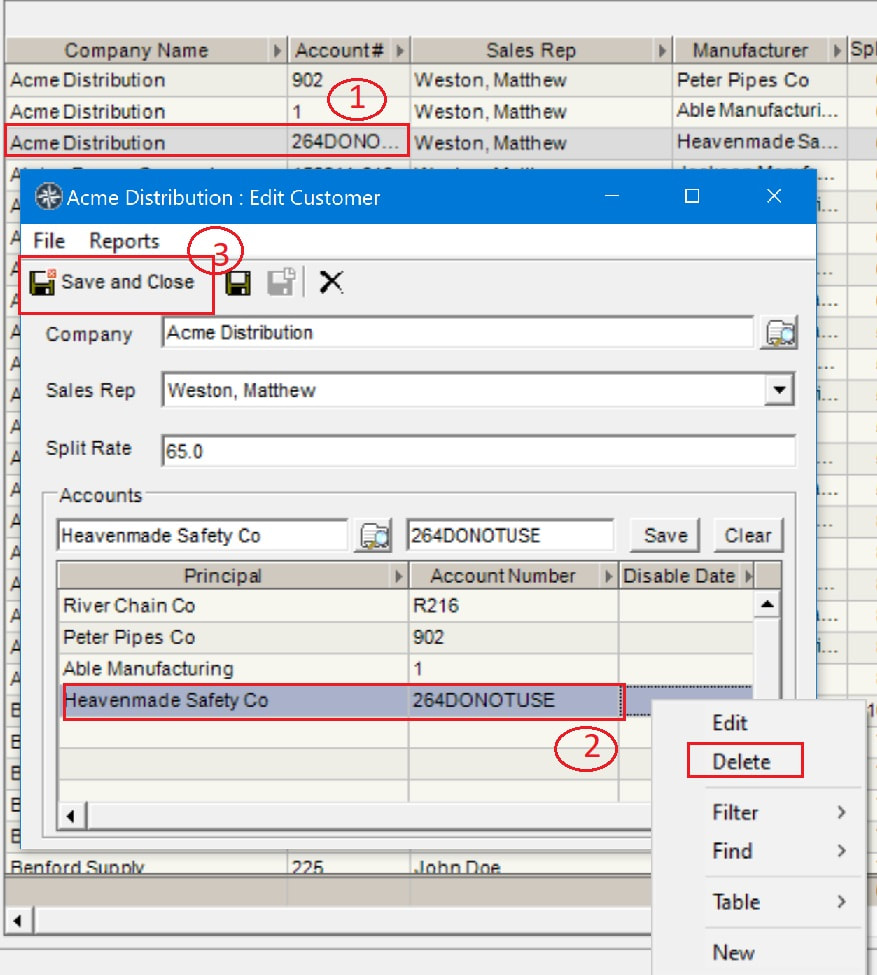 |