Campaigns - Manage:
- Attendee Types (e.g. Attendee, Prospect, Target, Organizer)
- Campaign Categories (e.g. Government, Hospitals, Job, Project)
- Campaign Types (e.g. End User Tradeshow, Principal Product Promotion)
Customer Relationship Management – Manage:
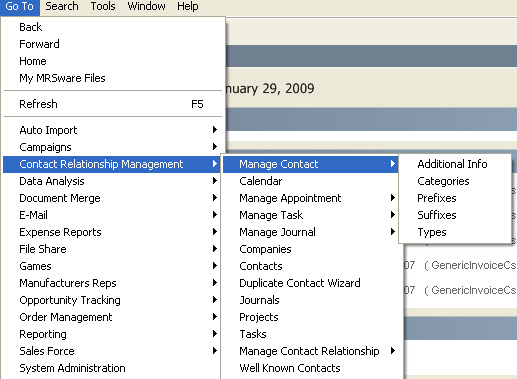
- Contact
- Additional Information (e.g. Private line phone #, Family names, Hobbies)
- Categories (e.g. Buying groups, Titles, Market segments)
- Prefixes (e.g. Mr, Ms, Dean, Prof, Rev)
- Suffixes (CPMR, CPA, Sr, Jr)
- Types (System Types, e.g. Customer, Prospect, Principal, End User)
- Appointments
- Categories (e.g. Sales Meeting, Mfgr Work with, Demo, Sales call)
- Labels (colors with e.g. Business, Holiday, Important, Personal)
- Types (e.g. Corporate, Holiday, Personal with Access Public, Private)
- Journals
- Categories (e.g. Sales call, Demo, End User call, Support/Service call)
- Types (e.g. Conversation, Meeting, Sales activity, Note)
- Tasks
- Categories (e.g. Literature request, Sample request, Quote/bid request)
- Types (e.g. Corporate, Personal with Access Public, Private)
- Contact Relationship
- Types (e.g. Customer, Principal, Rep, Vendor, Competitor)
Expense Reports – Manage
- Categories (e.g. Airfare, Entertainment, Hotel, Meal)
- Payment types (e.g. Cash, Company credit card, Personal credit card)
File Share - Manage
- Categories (e.g. Marketing, Quote, Sales)
Opportunity Tracking – Manage
- Close Reasons (e.g. Won – pricing, Won – met specs, Lost – pricing, Lost- packaging)
- Sales Opportunity Types (e.g. Lead, Prospect, School bid, Healthcare bid)
- Sales Phases (steps in your sales process, e.g. No action, Contact, Presentation, Discussion, Meetings, Creating specs, Quoting, Discussion, Commitment, Order, Payment Received)
To start, set up your attributes for Contacts, Appointments, Journals and Tasks. These are the areas in MRSware you will start using right away. Set up the Contact types and categories so everyone is consistent in their selections.
Here are the steps to create the attributes:
1. On the Menu Bar, Click on “Go To -> Customer Relationship Management -> Manage Contacts -> Categories”
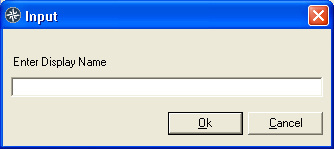
| 2. Click on “New” 3. Type the name of your type in the blank field (e.g. “attendee”, “prospect”, “target”) 4. Click “Ok” 5. Repeat as needed Create each attribute in the same manner. Take a look at the attribute list at the beginning of this article and set up a priority list. Follow the steps above substituting Manage Contact for the area you desire. Repeat as needed. You can set up or edit attributes at any time. |


 RSS Feed