
Following are the instructions on how to enter an invoice with line item details:
1. Open an "Add Invoice" window.
There are 3 ways to do this -
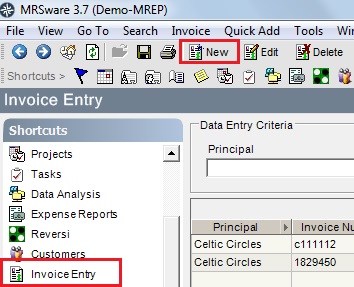
a - Go to the Shortcuts panel, scroll to and click on "Invoice Entry". When the screen opens, go to the Main tool bar and click on "New" (screenshot, below and left)
b - Go to the "New" tool bar and click on the "Create Invoice" icon (screenshot, below and middle)
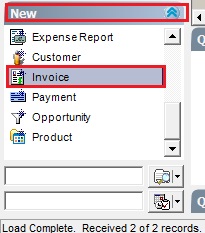
c - Go to the New panel, scroll to and click on "Invoice" (screenshot, below and right)
1. Open an "Add Invoice" window.
There are 3 ways to do this -
a - Go to the Shortcuts panel, scroll to and click on "Invoice Entry". When the screen opens, go to the Main tool bar and click on "New" (screenshot, below and left)
b - Go to the "New" tool bar and click on the "Create Invoice" icon (screenshot, below and middle)
c - Go to the New panel, scroll to and click on "Invoice" (screenshot, below and right)
 |  |  |
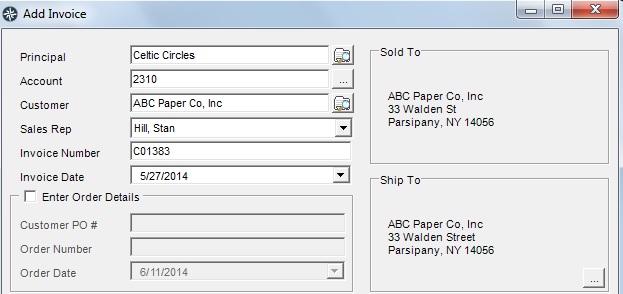
2. In the Add Invoice window type in:
- the name of the Principal (manufacturer who sent the invoice) in the "Principal" field
- the name of the Customer in the "Customer" field
** Notice when you type in the Customer name the Account number, Sales Rep name, and Sales Rep Split fields all fill in automatically, if this information has been entered in the system prior to entering the invoice. If the information was not previously entered you can enter it now.
- the invoice number in the "Invoice Number" field
- the invoice date in the "Invoice Date" field
3. Uncheck the "Skip Line Items" box in order to enter line item details.
4. Select either "Commission by rate" or the "Commission by amount".
5. Continue to fill in the line item details:
- enter the SKU number in the "Item Number" field.
** Notice the Description and Price fields are automatically filled in, when you type in the SKU number (if the SKU is already in the Product catalog).
- enter the amount ordered in the "Ordered" field.
- enter the amount shipped in the "Shipped" field.
- enter either the commission rate or the commission amount - depending on which option you selected.
- click on the "Add" button.
6. Repeat step 5 until all of the line items from the invoice have been entered.
7. Click on "Save" to save and close the invoice.

8-a. Click on "Save and New" to continue adding invoices for the same manufacturer.
OR
8-b. Click on the down arrow to the right of "Save and New" and select "Save and New, Same Customer" if you have more than one invoice for a customer.

You may have a few exceptions to the normal invoice entry process. For instance:
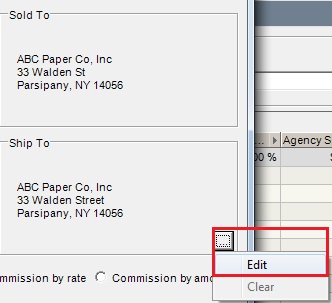
*** If you have a separate ship to address from the bill to address, you can manually enter the ship to address.
| 1. Click on the button with the three dots, in the lower right corner of the Ship To square, and click on "Edit". | 2. Enter the Ship To address details in the "Edit Alt Ship To" dialog. 3. When done, click "Ok" |
 |  |
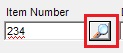
*** If the product SKU is not in the product catalog, you will see a red squiggly line under the number you entered into the "Item Number" field. You can manually add the SKU to the Product Catalog.
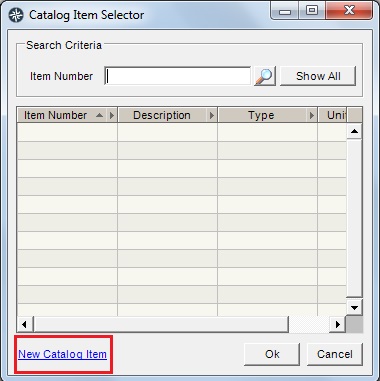
| 1. Click on the magnifying glass next to the "Item Number" field. | 2. Click on the "New Catalog Item" in the lower left corner of the Catalog Item Selector dialog. | 3. Enter the details of the product into the "Add/Edit Catalog Item" dialog. Use the drop down arrows to select the Product Type and the Unit Type. When entering the price keep in mind the Unit Type you selected. In other words don't enter the price for each if you selected "Dozen" in the Unit Type. 4. When done, click "Save". |
 |  | 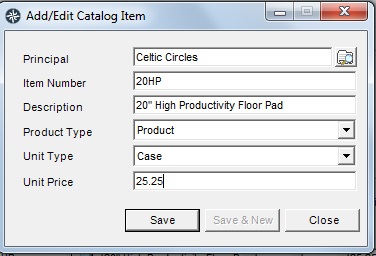 |
 RSS Feed