
Lesson 4
Chapter 2- Edit Company or Individual
Here's how to edit a current company or individual:
i - As in the MRSware desktop client there is more than 1 way to edit a company or individual
Chapter 2- Edit Company or Individual
Here's how to edit a current company or individual:
i - As in the MRSware desktop client there is more than 1 way to edit a company or individual
Desktop options
In the examples shown, we will edit the address of the company.
Option 1:
1 - Click or tap a company in your database to open a Review Company form
2 - Click or tap the down arrow at the right of the Addresses box
3 - Click or tap "Edit"
In the examples shown, we will edit the address of the company.
Option 1:
1 - Click or tap a company in your database to open a Review Company form
2 - Click or tap the down arrow at the right of the Addresses box
3 - Click or tap "Edit"
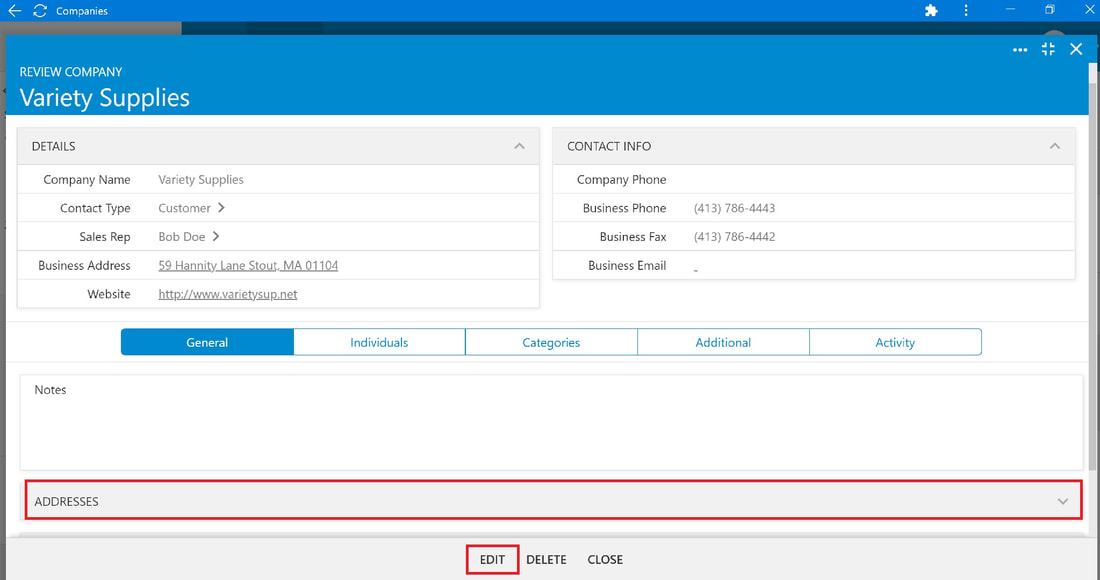
4 - Click or tap in the address box (either on the work "Business" or next to it)
5 - Click or tap "Edit"
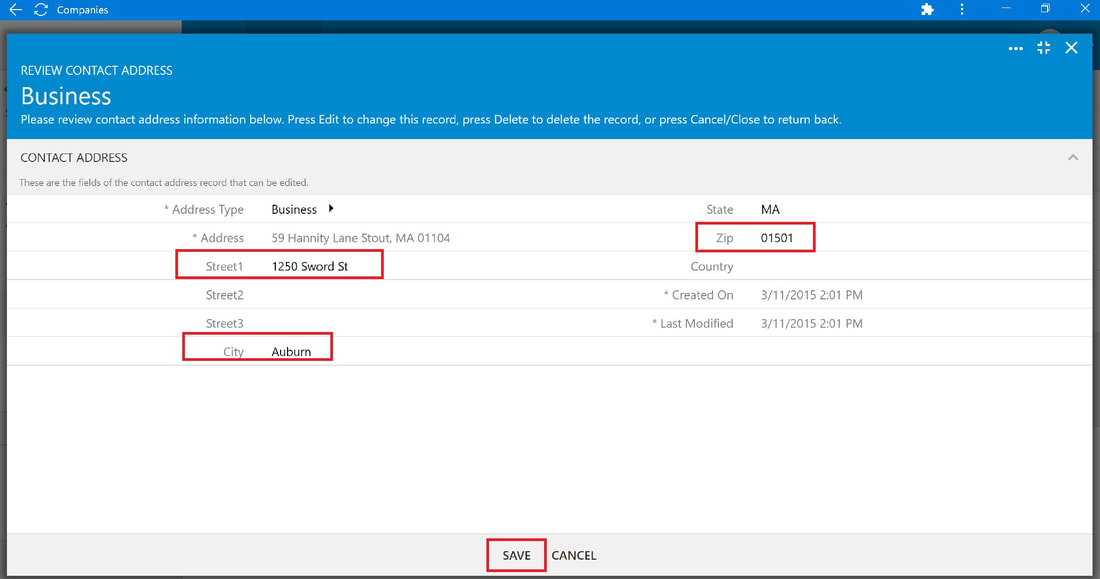
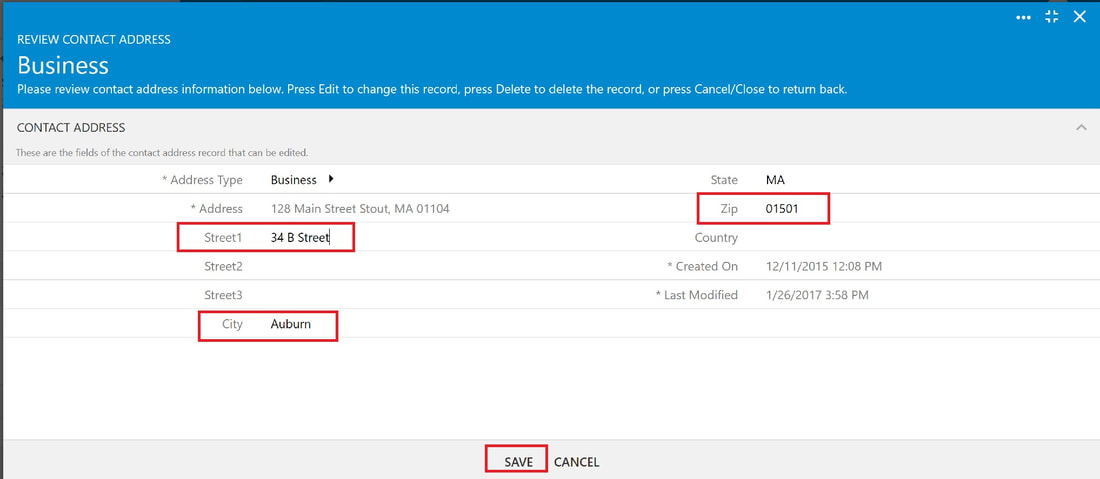
Change or add information to the form (we changed the information in "Street 1", "City", and "Zip")
6 - Click or tap "Save"
5 - Click or tap "Edit"
Change or add information to the form (we changed the information in "Street 1", "City", and "Zip")
6 - Click or tap "Save"
Option 2:
1 - Click or tap the 3 dots icon to the right of a company in your database to open a Review Company form
2 - Click or tap "Select" to open a Review Company form
(see screenshot below)
1 - Click or tap the 3 dots icon to the right of a company in your database to open a Review Company form
2 - Click or tap "Select" to open a Review Company form
(see screenshot below)

Either follow the steps as shown in Option 1, steps 2 - 6
OR
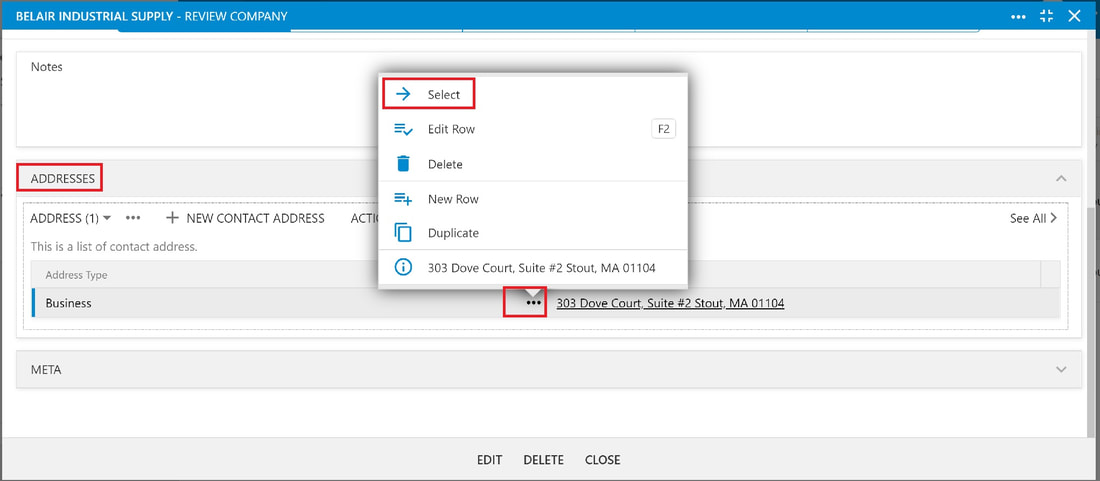
3 - Click or tap the down arrow at the right of the Addresses box
4 - Click or tap the 3 dots to the left of the address in the Addresses box
5 - Click or tap "Select"
6 - When the Review Contact Address form opens, click or tap "Edit"
OR
3 - Click or tap the down arrow at the right of the Addresses box
4 - Click or tap the 3 dots to the left of the address in the Addresses box
5 - Click or tap "Select"
6 - When the Review Contact Address form opens, click or tap "Edit"
Change or add information to the form (we changed the information in "Street 1", "City", and "Zip")
7 - Click or tap "Save"

Option 3:
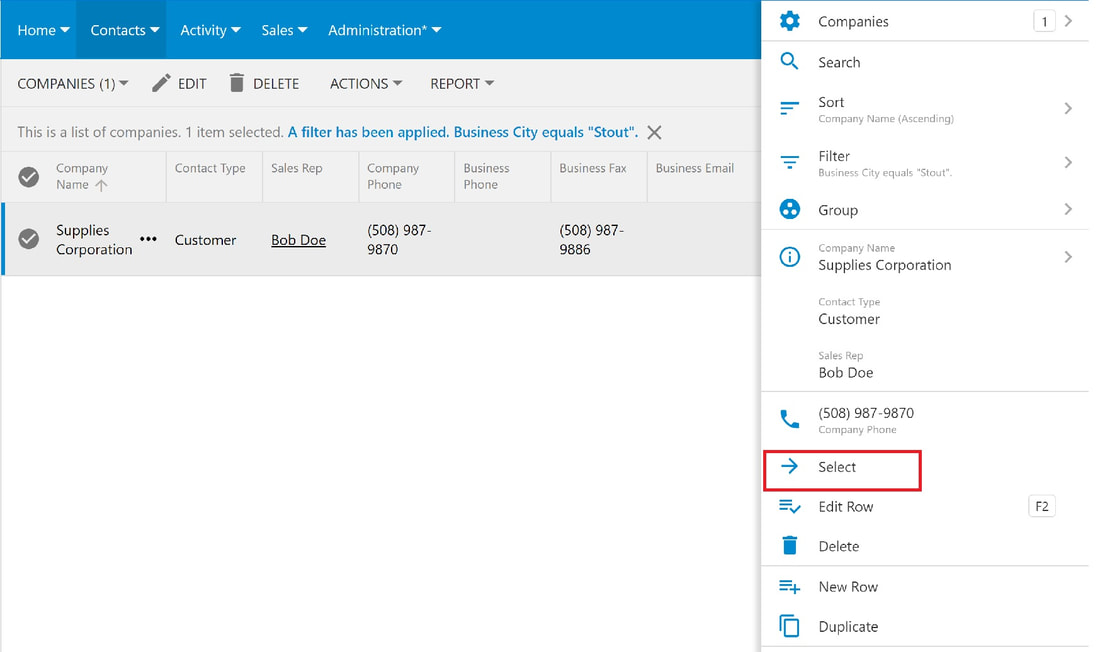
1- Click or tap the circle to the left of a company in your database
2 - Click or tap the 3 dots on the Menu bar, to the right of your Account initial
(see the top screenshot below)
3 - Click or tap "Select" from the Slidebar menu to open a Review Company form
(see the bottom screenshot below)

Either follow the steps as shown in Option 1, steps 2 - 6
OR
Follow the steps as shown in Option 2, steps 3 - 7
OR
Follow the steps as shown in Option 2, steps 3 - 7
Mobile options:
In the examples shown, we will edit the address of the company.
Option 1:
1 - Tap a company in your database to open a Review Company form
2 - Scroll down to and tap on the down arrow to the right of the "Addresses" box
3 - Tap the 3 dots on the top right of the address you want to edit
(see screenshot below left)
4 - Tap "Select"
(see screenshot below middle)
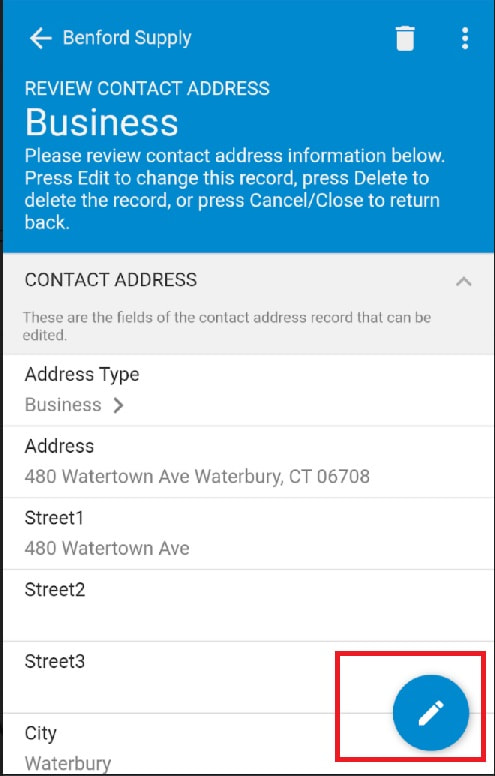
5 - Tap the pencil icon to edit the form
(see screenshot below right)
1 - Tap a company in your database to open a Review Company form
2 - Scroll down to and tap on the down arrow to the right of the "Addresses" box
3 - Tap the 3 dots on the top right of the address you want to edit
(see screenshot below left)
4 - Tap "Select"
(see screenshot below middle)
5 - Tap the pencil icon to edit the form
(see screenshot below right)
| |  |  |
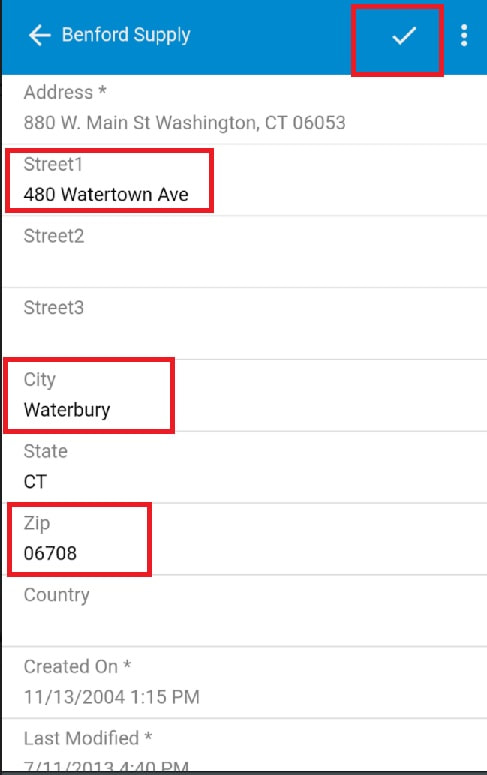
Change or add information to the form (we changed the information in "Street 1", "City", and "Zip")
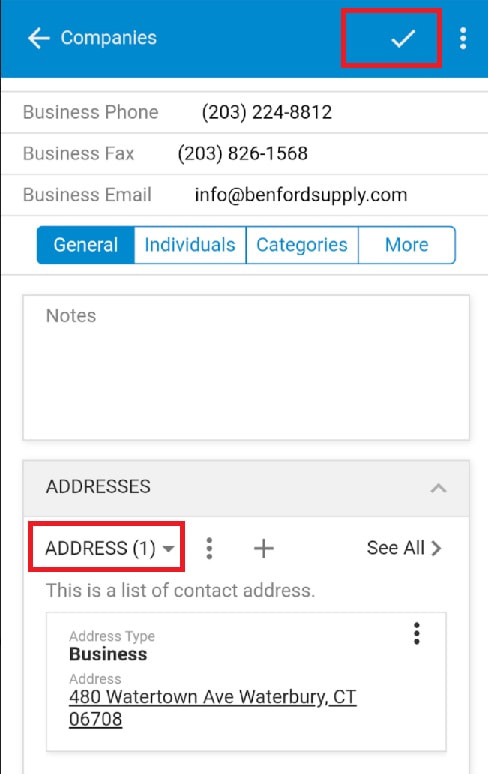
6 - Tap "Save" (the checkmark on the top Menu bar) to save the changes
(see the screenshot below left)
i If the Shipping Address is the same as the Billing Address, you can delete the Shipping Address by tapping the 3 dots next to the address to delete; then tap "Delete"; then tap "Save" (the checkmark on the top Menu bar) to save the changes.
(see the screenshot below right that shows there is only 1 Address in the Company form)
Change or add information to the form (we changed the information in "Street 1", "City", and "Zip")
6 - Tap "Save" (the checkmark on the top Menu bar) to save the changes
(see the screenshot below left)
i If the Shipping Address is the same as the Billing Address, you can delete the Shipping Address by tapping the 3 dots next to the address to delete; then tap "Delete"; then tap "Save" (the checkmark on the top Menu bar) to save the changes.
(see the screenshot below right that shows there is only 1 Address in the Company form)
 |  |
Option 2:
1a - Scroll to a company in your database you want to edit
OR
1b - Use "Search" (the magnifying glass icon on the Menu bar) to find a company
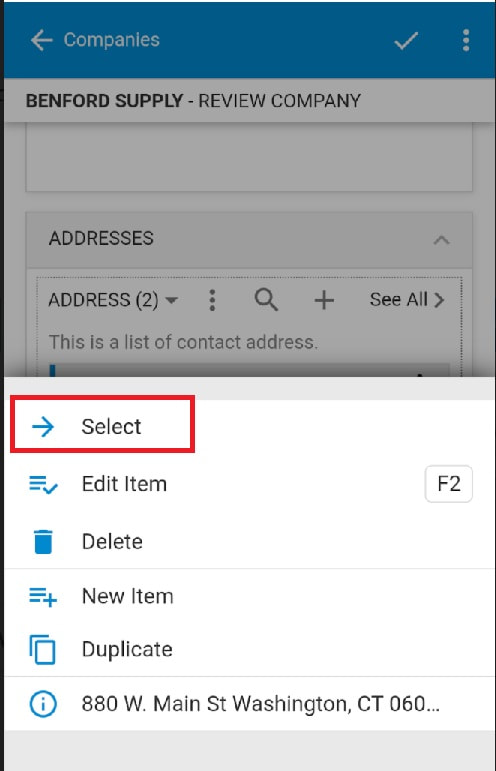
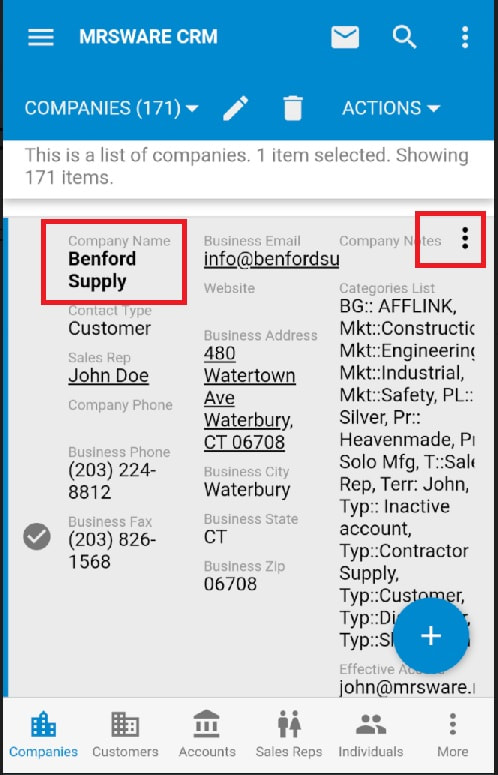
2 - Tap the 3 dots on the top right of the company listing
3 - Tap "Select" from the Slidebar (it pops up from the bottom of the screen) to open a Review Company form
Follow the steps as shown in Option 1, steps 2 - 6
1a - Scroll to a company in your database you want to edit
OR
1b - Use "Search" (the magnifying glass icon on the Menu bar) to find a company
2 - Tap the 3 dots on the top right of the company listing
3 - Tap "Select" from the Slidebar (it pops up from the bottom of the screen) to open a Review Company form
Follow the steps as shown in Option 1, steps 2 - 6
 |  |
 RSS Feed