
Lesson 4
Chapter 3 - Create a New Contact
Here's how to add a new company or individual:
i - As in the MRSware desktop client there is more than 1 way to add a new company or individual
Chapter 3 - Create a New Contact
Here's how to add a new company or individual:
i - As in the MRSware desktop client there is more than 1 way to add a new company or individual
Desktop Options
In the examples shown, we will add new individuals.
There are 2 different types of new individuals:
1 - a new individual at an existing company
2 - a new individual not associated with an existing company
In Option 1 we will add a new individual to an existing company.
Option 1:
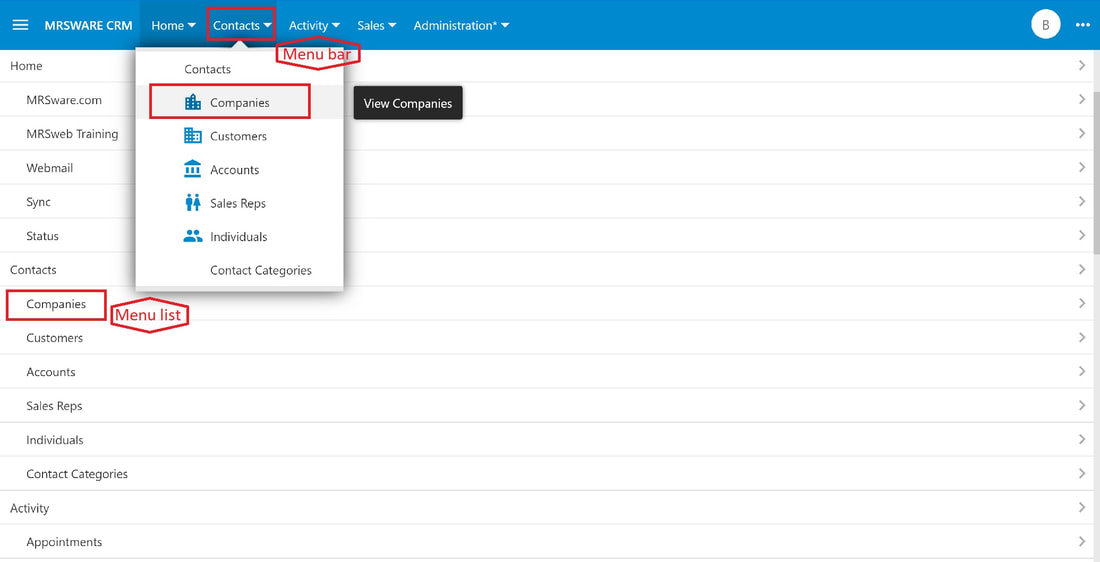
1. Click or tap "Contacts -> Companies" from either the Menu bar or "Companies" from the Menu list
In the examples shown, we will add new individuals.
There are 2 different types of new individuals:
1 - a new individual at an existing company
2 - a new individual not associated with an existing company
In Option 1 we will add a new individual to an existing company.
Option 1:
1. Click or tap "Contacts -> Companies" from either the Menu bar or "Companies" from the Menu list
2. Scroll to select or Search for a company in your database
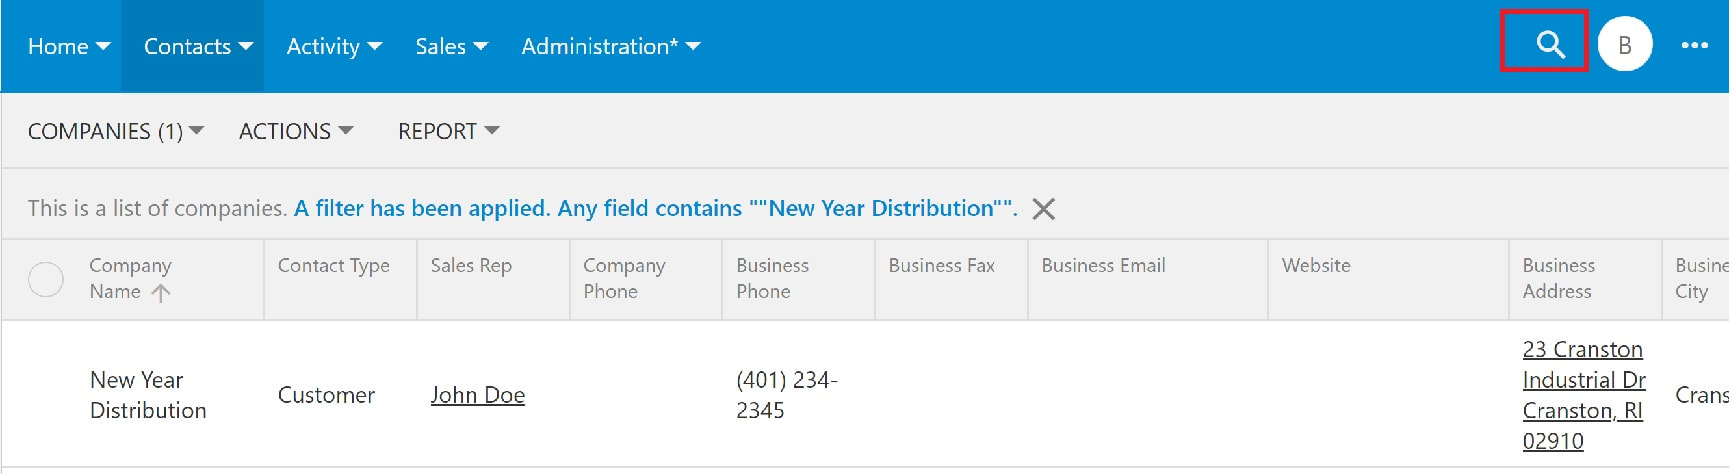
3. Click or tap the selected company to open a Review Company form
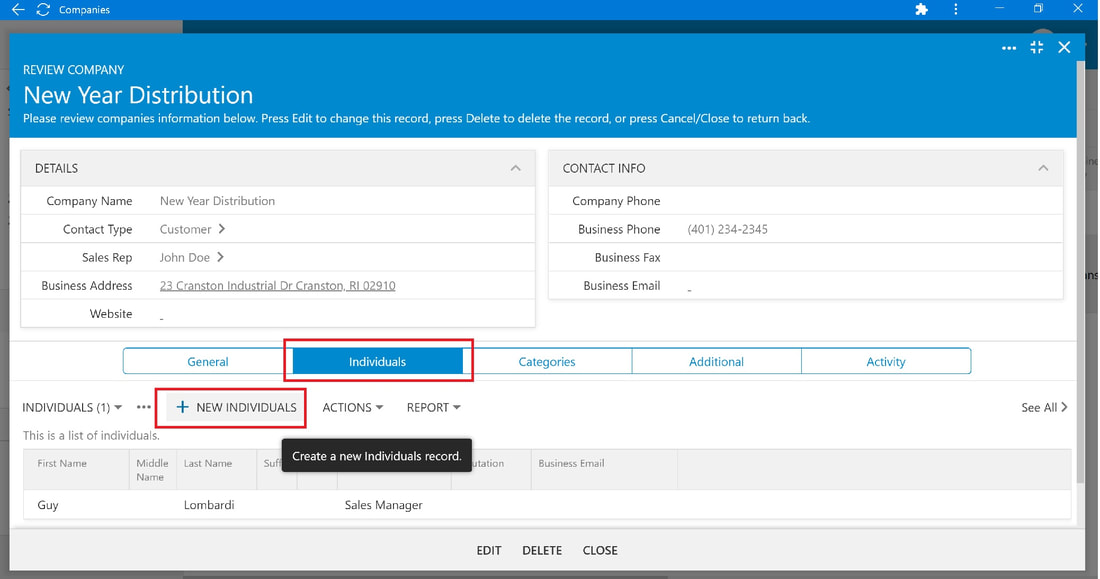
4. Click or tap the "Individuals" tab
5. Click or tap "New Individuals"
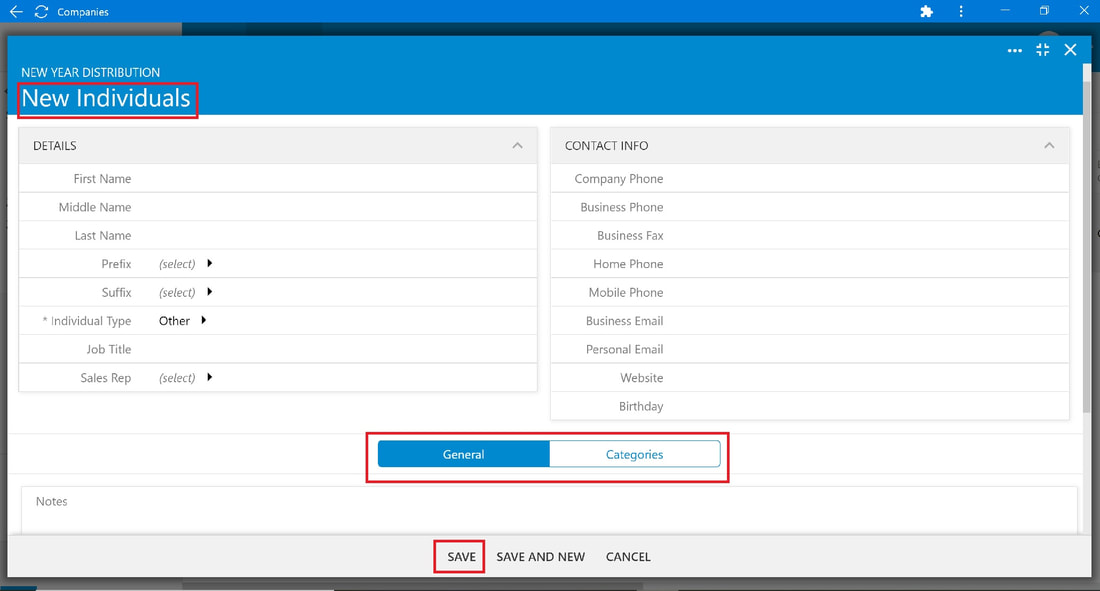
6. Fill out the "New Individuals" form
* Note there are 2 tabs:
- General - the form opens in the General tab; this page contains the basic information about the person
- Categories - displays attributes assigned by you to aid in keyword searches
7. Click or tap the "Categories" tab to select
8. When the form is complete, click or tap "Save"
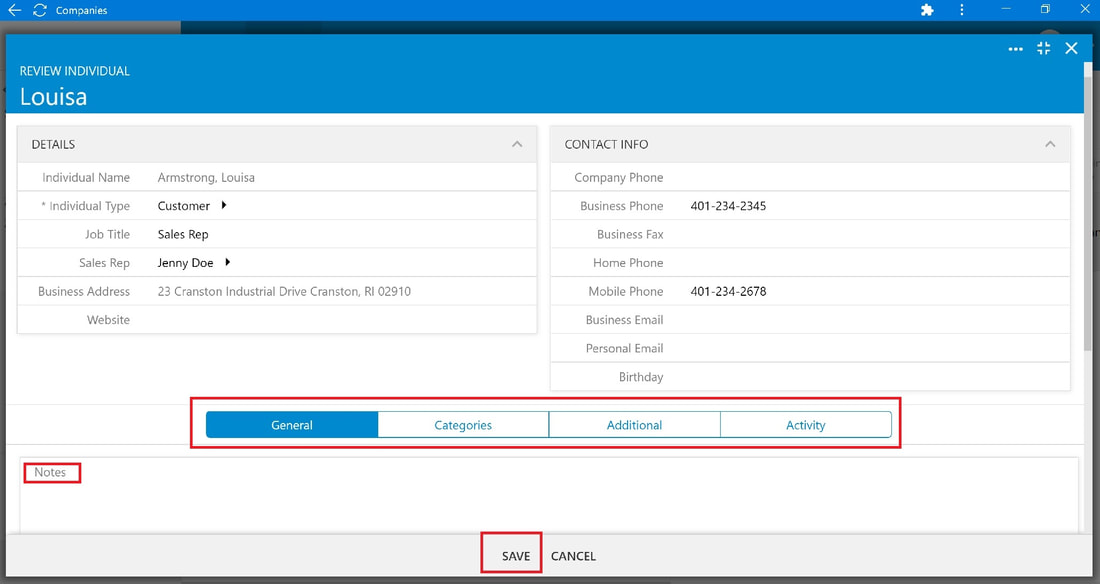
Once saved, the Review Individual record opens.
* Note there are now 4 tabs :
- General - the form opens in the General tab; this page contains the basic information about the person
- Categories - displays attributes assigned by you to aid in keyword searches
- Additional - displays extra information that doesn't fit elsewhere
- Activity - displays all touchpoints with the person
9. Click or tap the other tabs to add more information.
There is also a Notes field where you can add important information about the person.
10. When the record is complete, click or tap "Save".

In Options 2 & 3 we will add a new individual, not associated with an existing company.
Option 2:
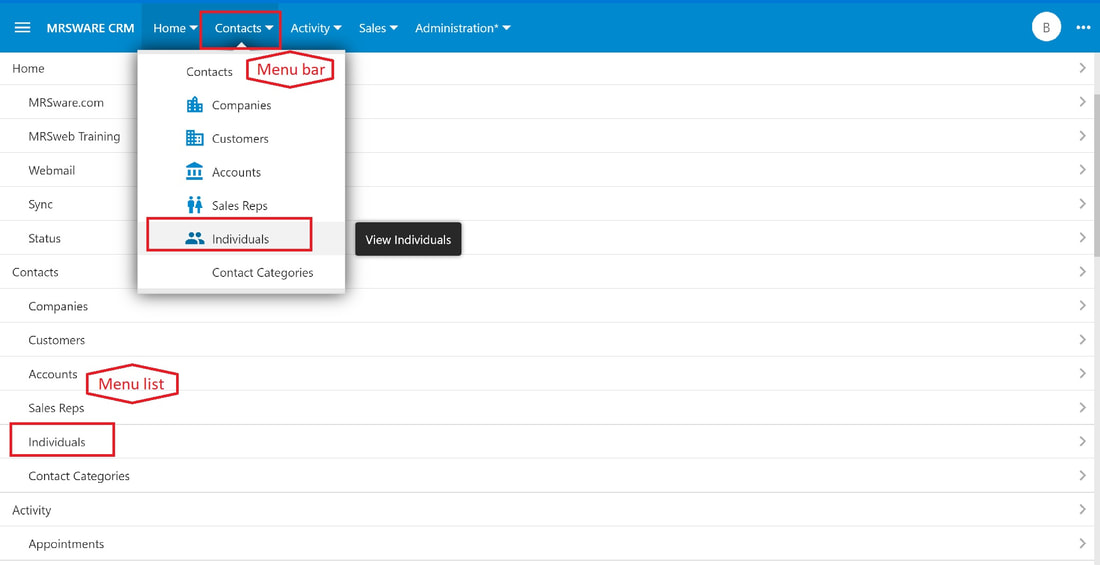
1. Click or tap "Contacts -> Individuals" on the Menu bar, or "Individuals" from the Menu list
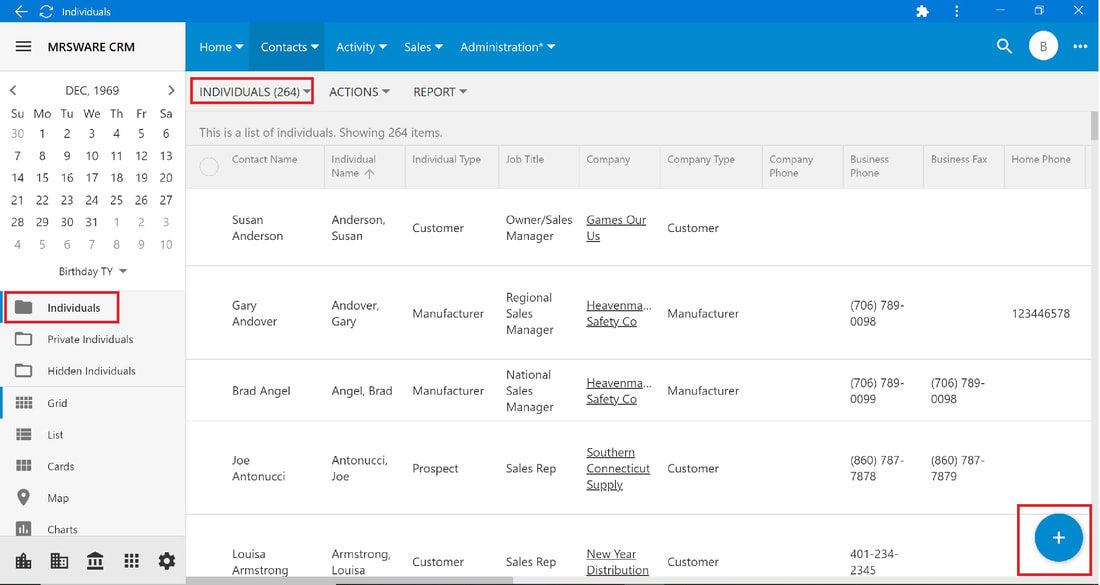
2. Click or tap the large "+" icon in the lower right corner of the page (screenshot below)
3. Fill out the "New Individuals" form.
4. Click or tap on each tab to add more information.
5. When the form is complete, click or tap "Save".
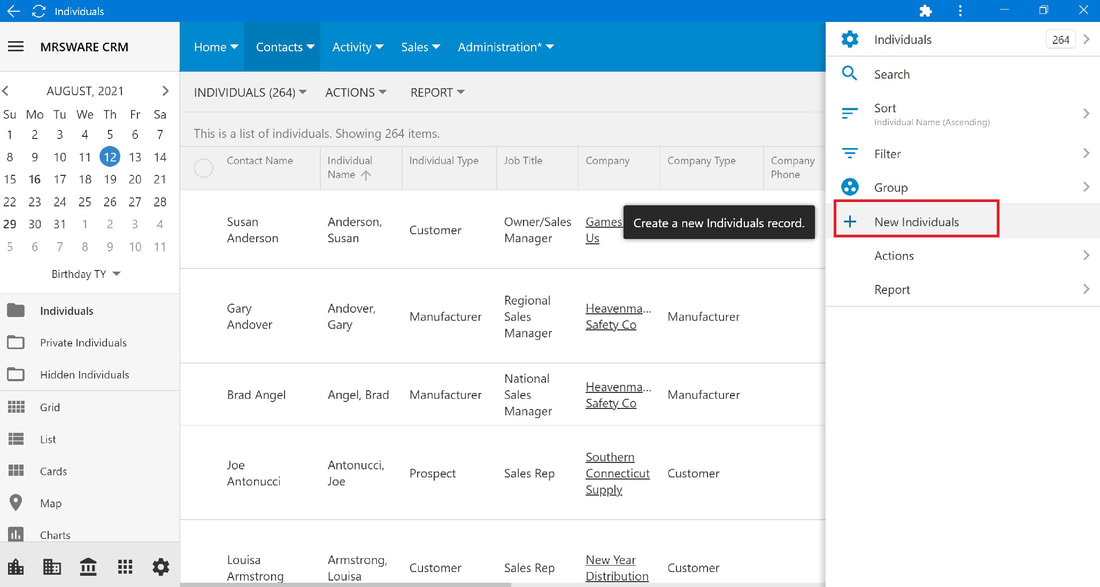
Option 3:
1. Click or tap "Contacts -> Individuals" on the Menu bar, or "Individuals" from the Menu list
2. Click or tap the "3 dots" icon on the Menu bar
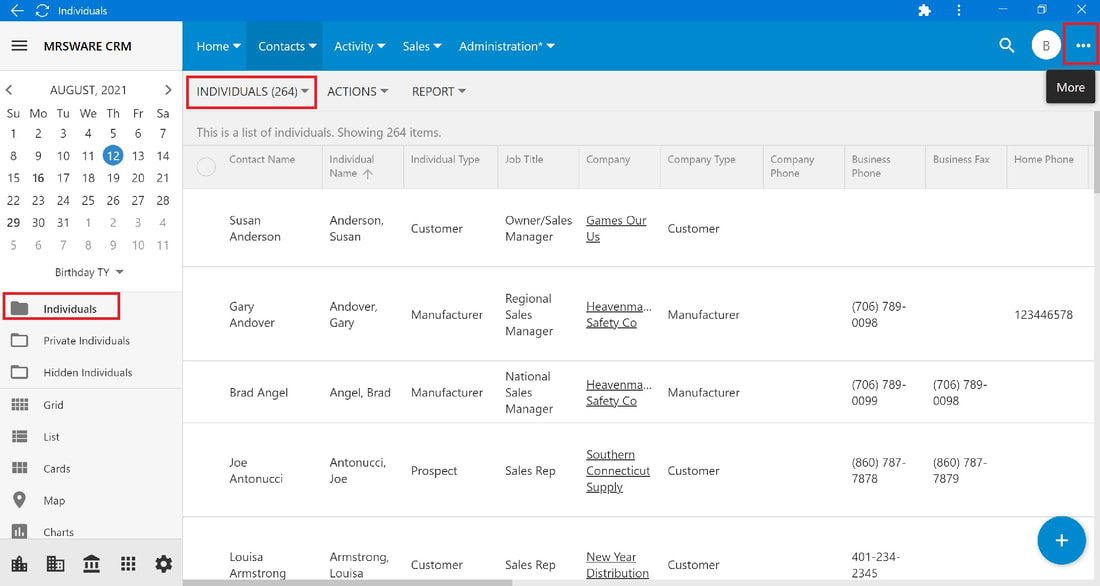
3. Click or tap "New Individuals" on the slidebar
4. Fill out the "New Individuals" form.
5. Click or tap on each tab to add more information.
6. When the form is complete, click or tap "Save".
Mobile Options:
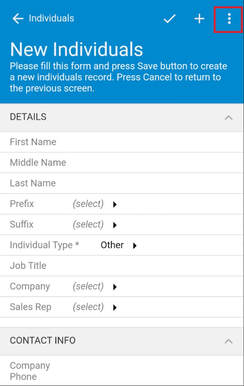
| Option 1: 1. From the Home page, tap "Contacts -> Individuals" (screenshot on the left) OR 1. From the Tab bar (bottom of the page, tap the "Individuals" icon. (screenshot on the right) |  | 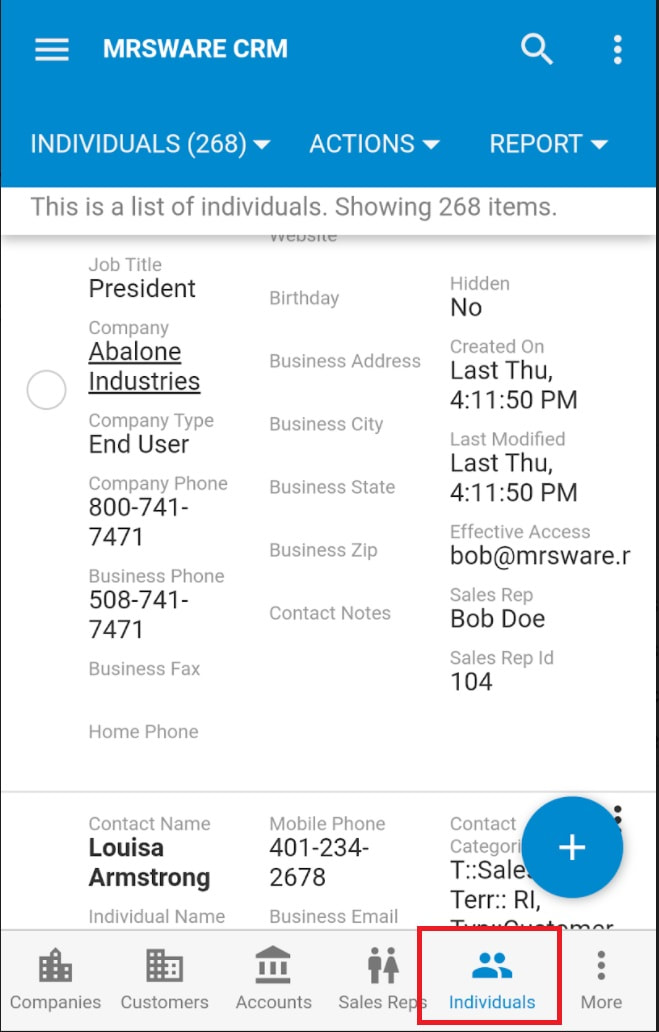 |
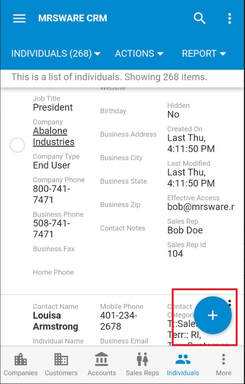 | 2. Tap the "Plus" icon (lower right corner) to open the New Individuals form. |
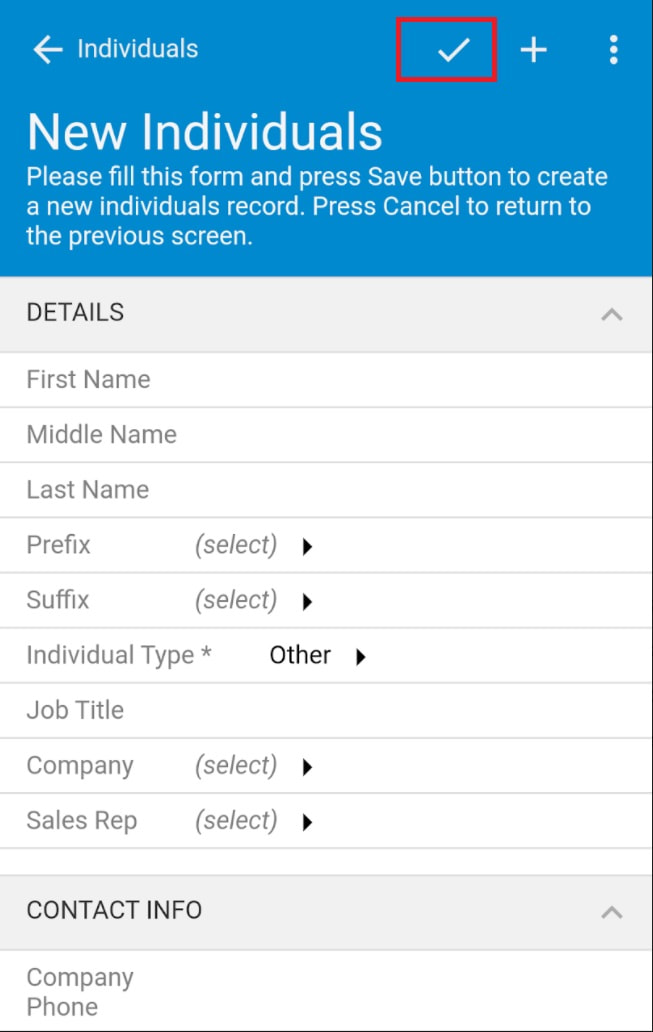
| 3. Fill out the form. 4. When complete, tap the "checkmark" icon (top menu bar) to Save. | 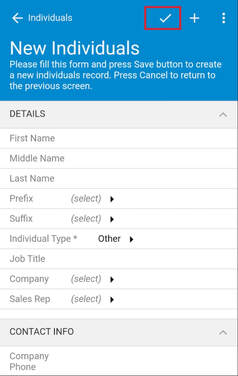 |
 | Option 2: To add more than 1 individual or multiple branches of a company: 1. Complete the New Individual form 2. Tap the "3 dots" icon (top menu bar) |
| A slidebar opens 3. Tap "Save and New" This will save the current contact and open a New Individuals form 4. Fill out the new form Repeat steps 2 and 3 to continue to add new individuals | 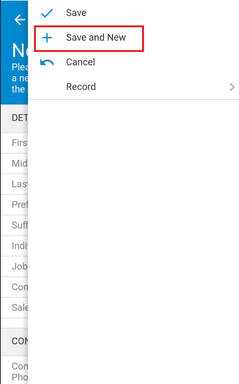 |
 | 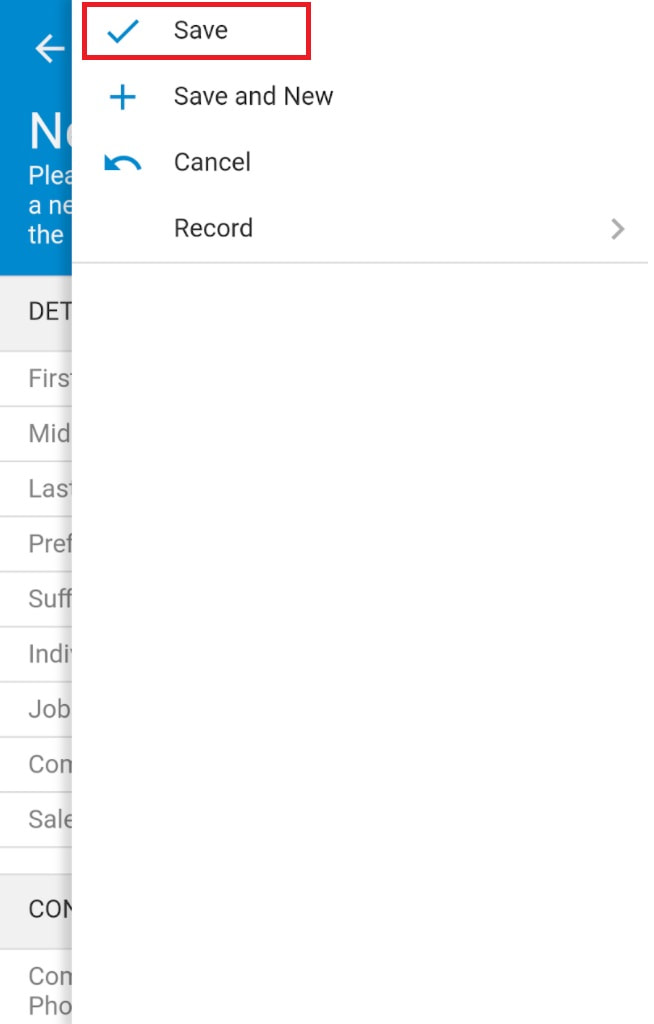 | When finished 5. Tap the "checkmark" to save the new contact (screenshot on the left) Or 5. Tap "Save" on the slidebar menu (screenshot on the right) |
| Option 3: To add a new contact from a Review Individual form: 1. Tap on the "3 dots" icon (top menu bar) on the "Review Company" record A slidebar opens 2. Tap "New Individuals" 3. Fill out the form When finished 4. Tap the "checkmark" icon to Save | 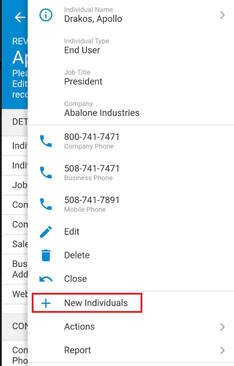 |
 RSS Feed